...
After a unique SSN and last and first name combination has been entered, a new patient record may be created. Choose “Submit” and you will either be taken to patient create from pathology report if your facility has a pathology report associated with this patient or the screen displays the SSN and name for the potential new record.
If patient does not have an associated pathology report:
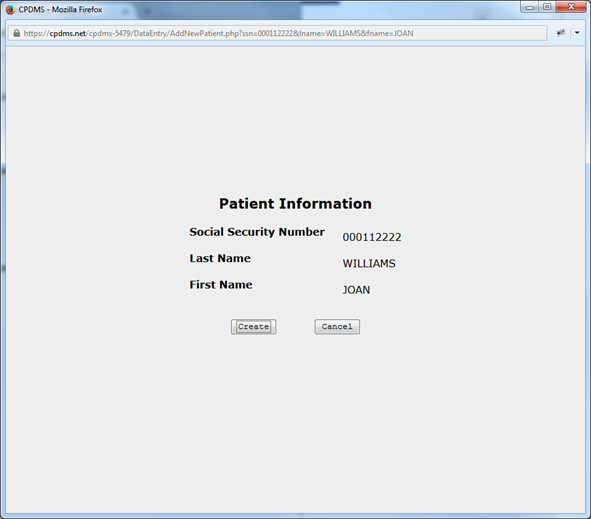
Select “Create” to create the record and go on to the Patient Data Edit Form. To return to the Patient Key entry screen without creating a new record, press TAB and ENTER to select “Cancel.”
...
To continue entering data for the current patient, choose CREATE from the Main Menu and then select Case from the CREATE submenu. The following screen is displayed in which the key fields for the case record must be entered:

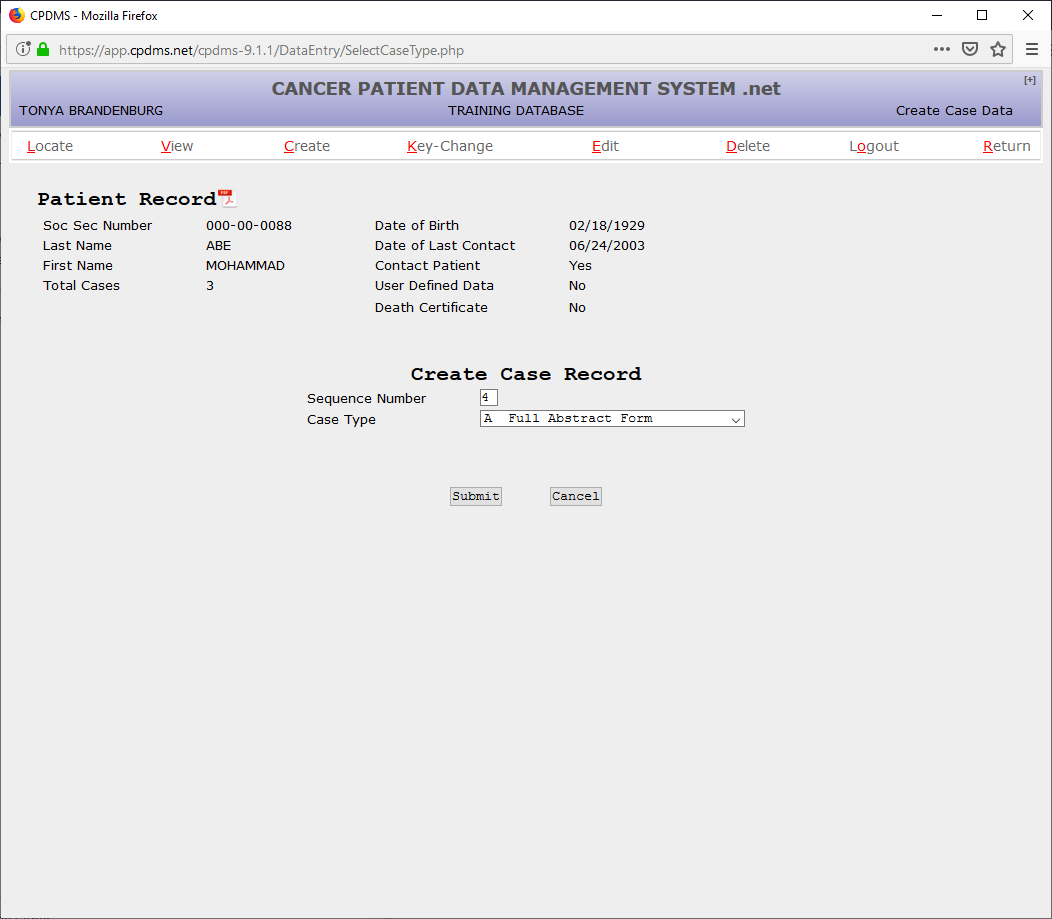
The sequence number field defaults to the next available sequence number for the current patient. This value may be written over with another number. However, the current patient record may not be saved without errors until all sequence numbers stored for this patient are sequential, starting with number one.
...
If ‘Other Primary’ is selected, the year of diagnosis and site group must be entered. If the year of diagnosis is unknown, use ‘9999.’ A site group Choice List is available by using F2 or clicking on the magnifying glass (see below).

A brief remark regarding the diagnosis and/or treatment of this malignancy, or any other pertinent information (i.e., patient was a resident of another state at diagnosis), may be entered in the “Comment” field. After these fields have been completed, choose “Submit” to save as a Case Type Other.
Now the case is displayed.

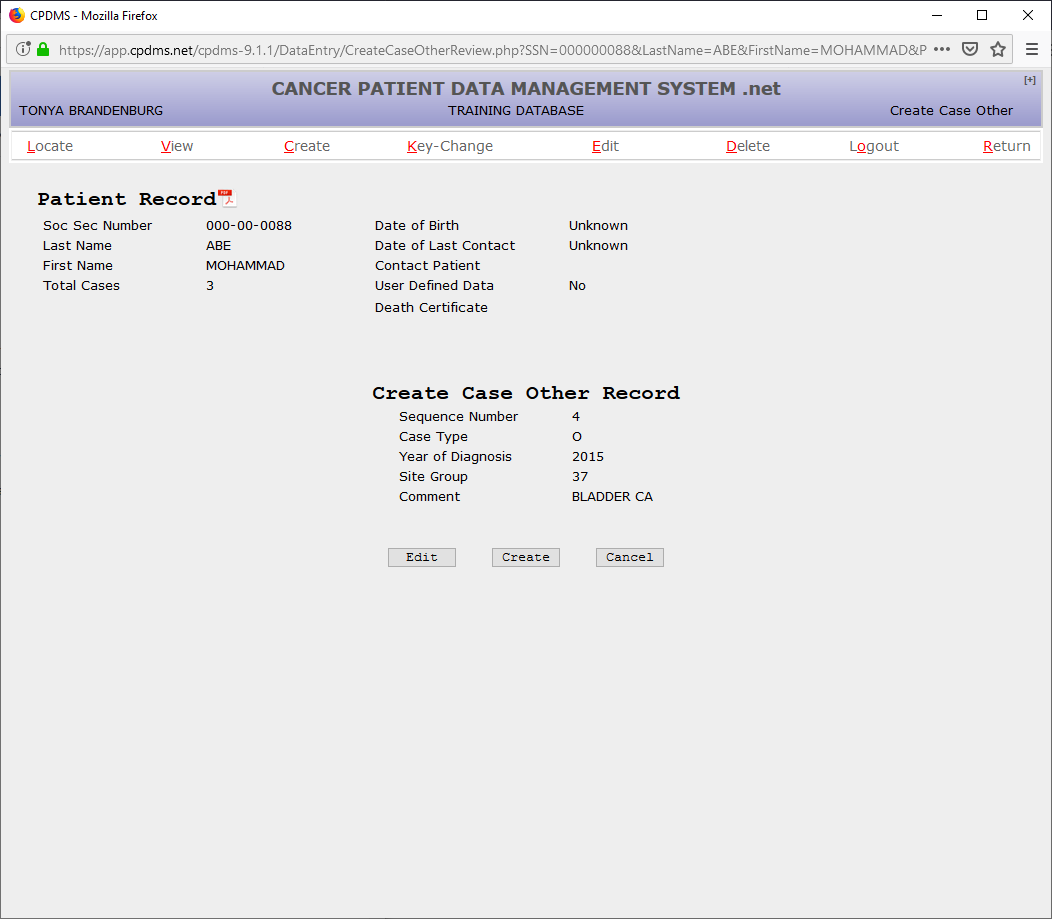
Select “Edit” to modify the data that has been entered, or “Cancel” to escape without saving the data. Choose “Create” to create a case record.
...
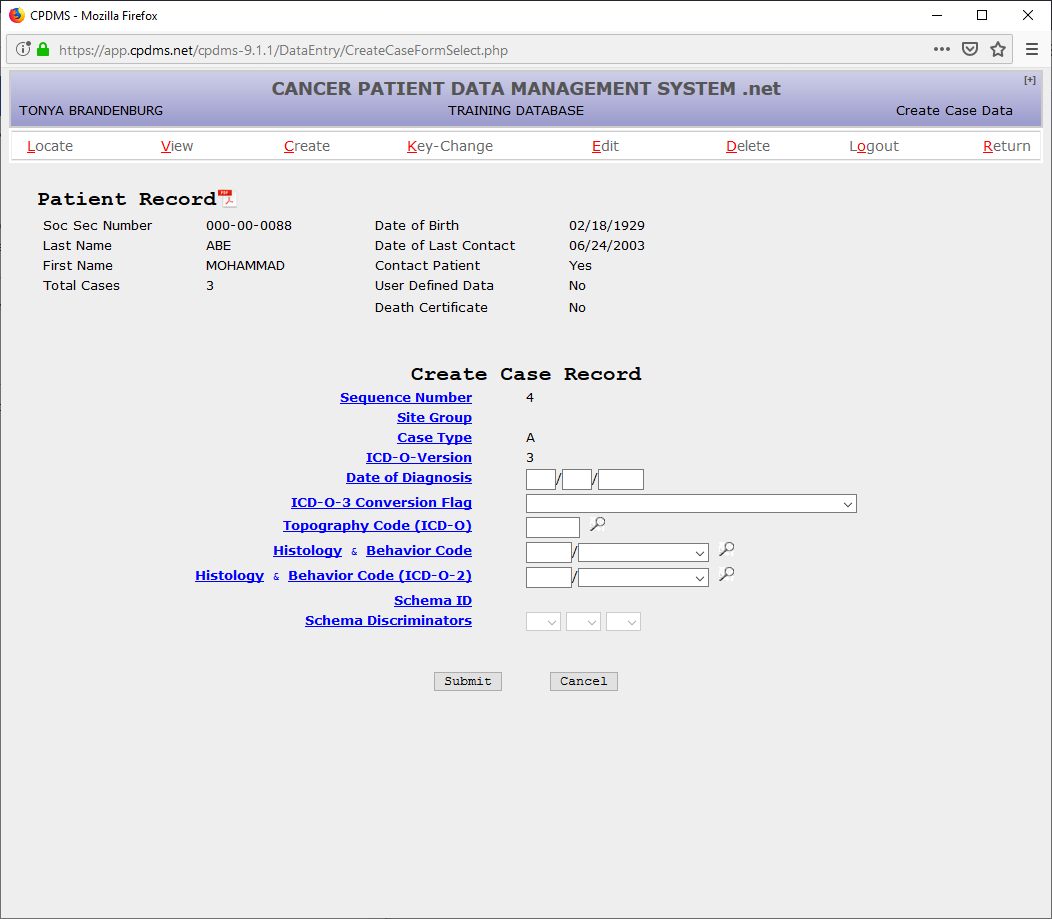
After the previous fields have been completed, select “Submit” to save the data entered, or “Cancel” to escape without saving. If “Submit” was chosen, the following screen will appear:

Select “Edit” to modify the data that has been entered, or “Cancel” to escape without saving the data. Choose “Create” to create a case record.

If the patient has an associated path report:
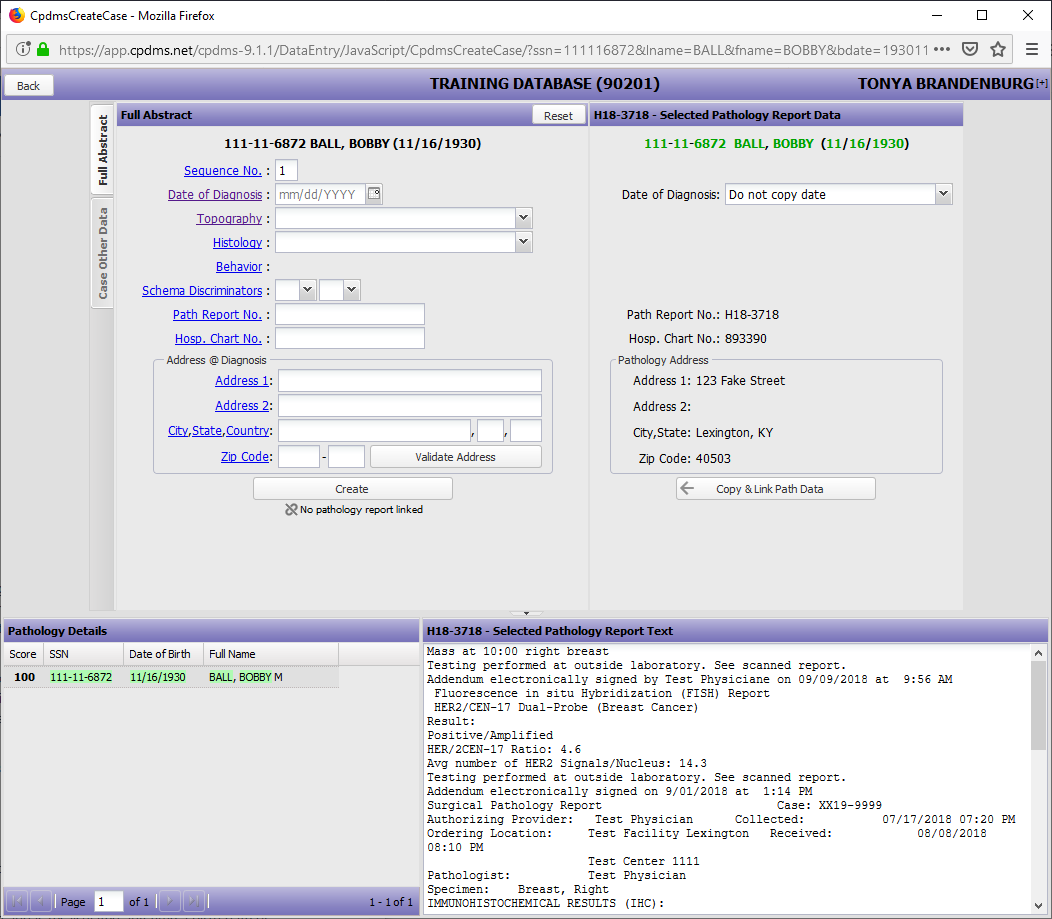
Once you put in the SSN, name, and date of birth and click "submit" you will be taken to the screen below:
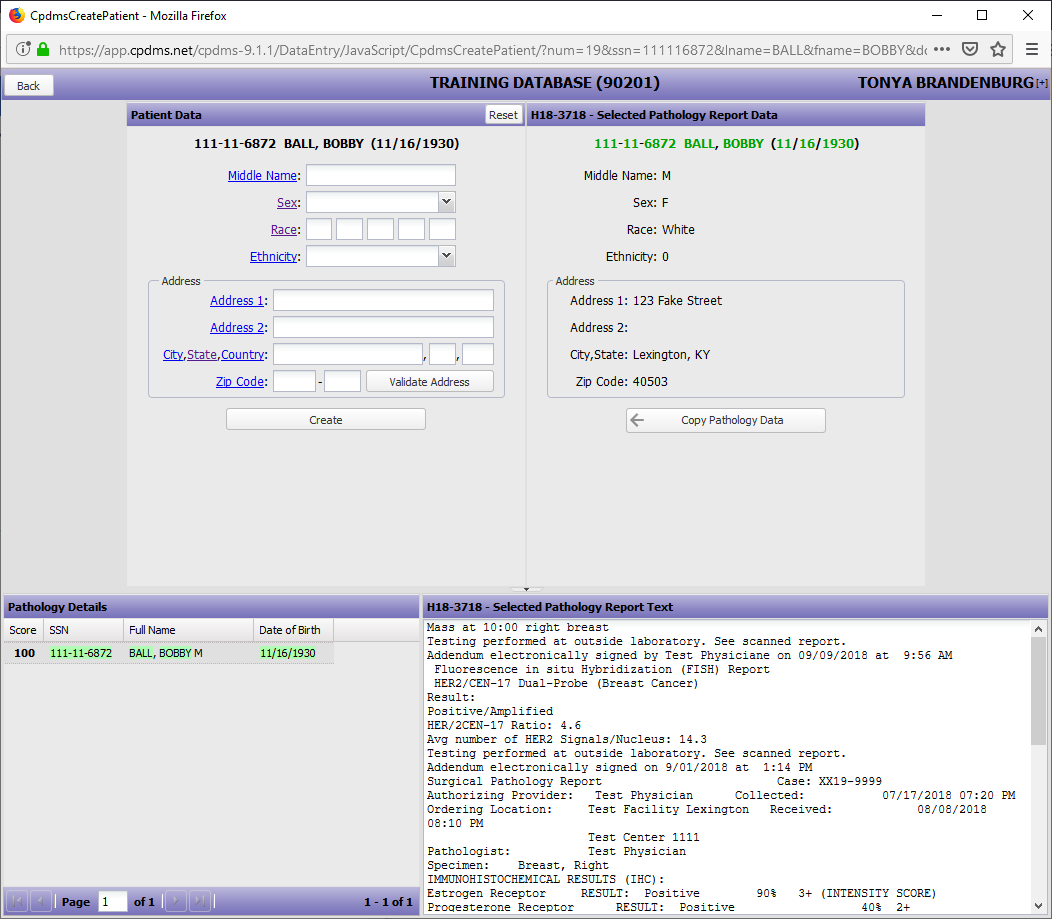
Click copy pathology data to use the address listed if it is correct and fill in any missing informationThe Case Data Edit Form is now displayed, as seen below:
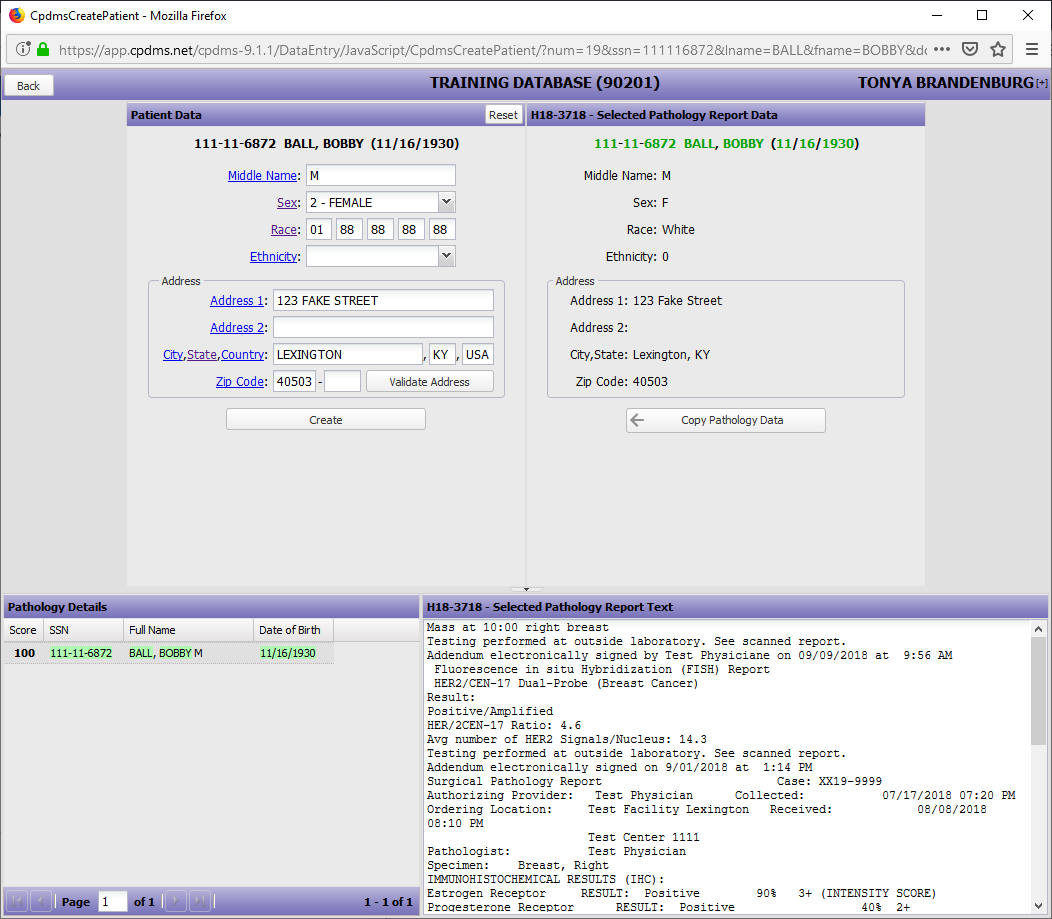
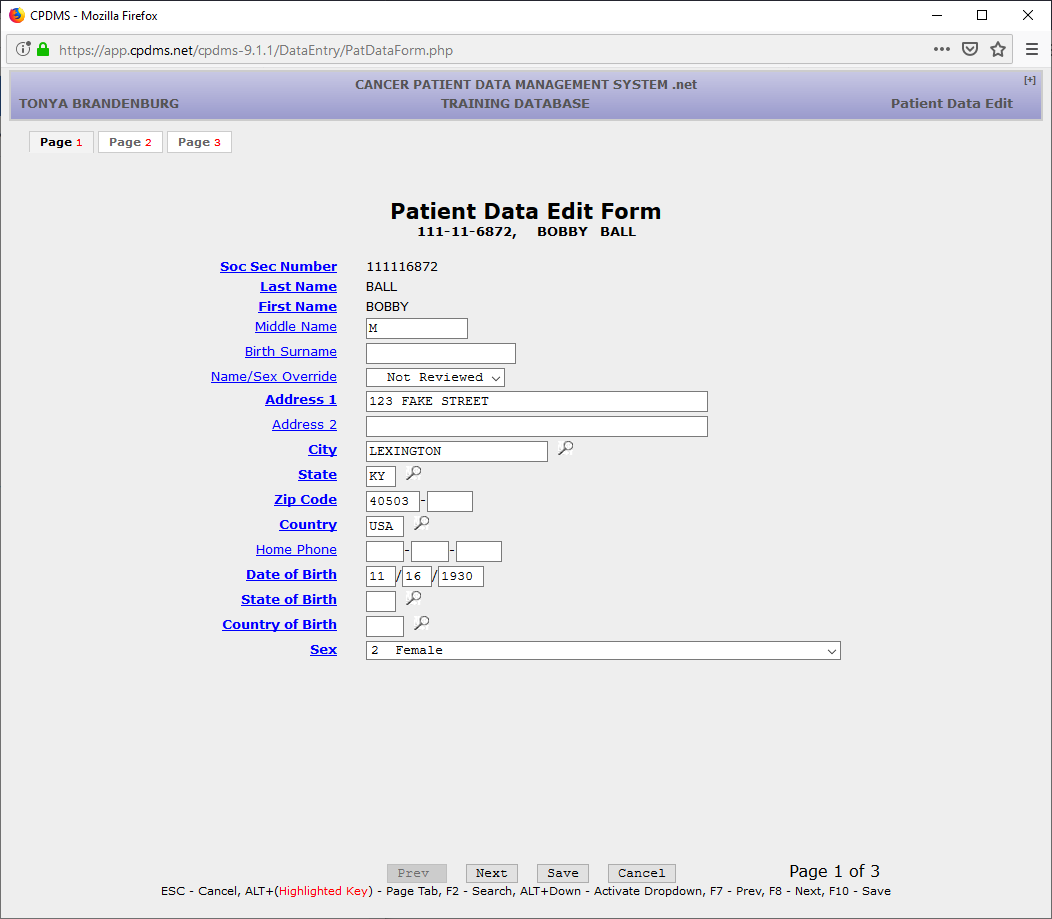
Once you have input the information click create and you will be taken to the Patient Data Edit Form, as seen below:
Select “Edit” to modify the data that has been entered, or “Cancel” to escape without saving the data. Choose “Create” to create a case record.
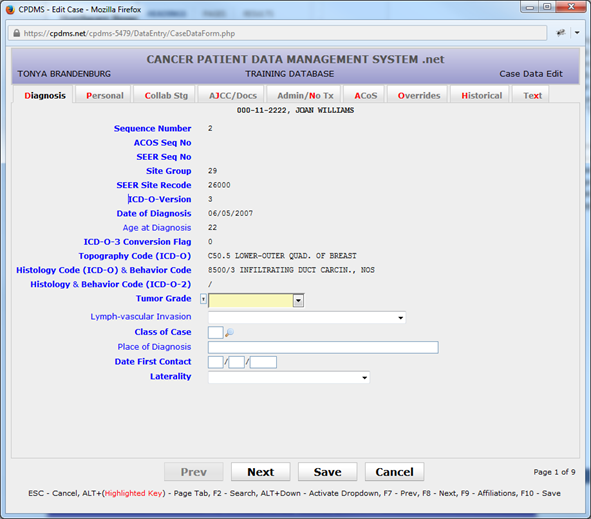
The Case Data Edit Form is now displayed, as seen below:
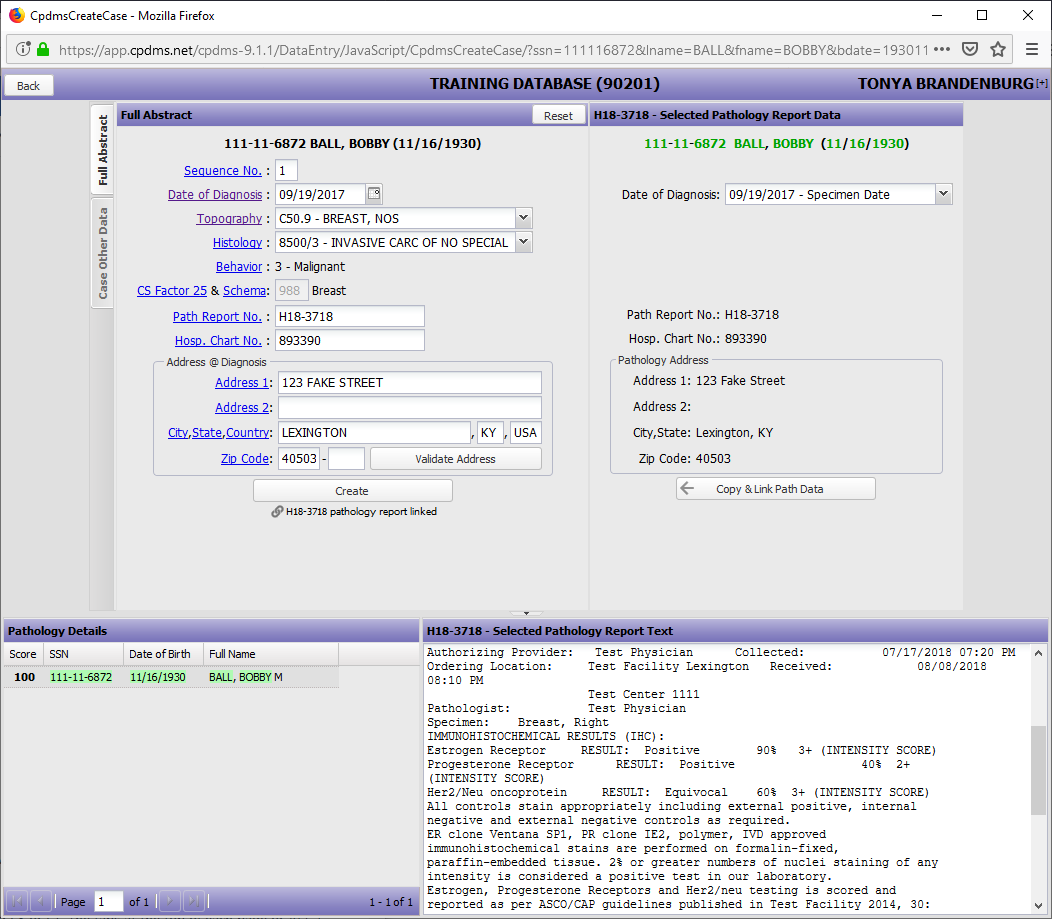
Once the patient is created you can now create the case using the pathology report, as seen below:
Once you have linked the pathology report you want and copied any information necessary click "create", as seen below:
The Case Data Edit Form is eight pages long, and may be navigated using the “Next” and “Prev” buttons, or by pressing F8 or F7. The tabs at the top of each page or ALT + hot key may be used to move directly to a particular page. There is a ninth tab on the top of the page labeled “Text” which opens the text data entry screen. Text may be entered and saved at any point during case data entry. After text has been saved, the cursor is automatically returned to the previous field in the Case Data Edit Form. (See the section on creating text at the end of “Enter a New Patient” for instructions regarding entering text.)
...
Use the “Next” button, the F8 key, or the “Collab Stg” “EOD” tab to go to the next page.

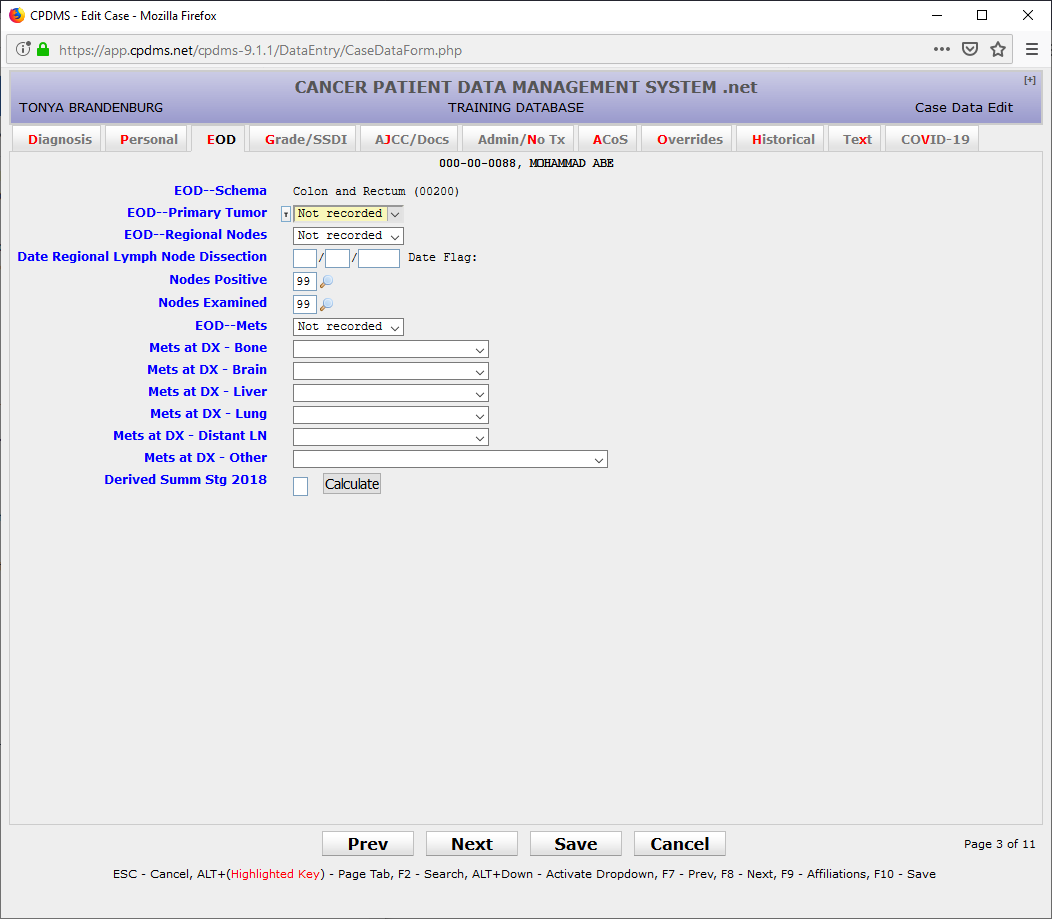
CS Tumor Size – Mandatory field; must be numeric. This field is three digits long. CS Extension EOD Primary Tumor – Mandatory field; must be numeric.CS Size/Extent Evaluation
EOD Regional Nodes – Mandatory field; must be numeric. CS Lymph Nodes – Mandatory field; must be numeric.CS Regional Nodes Evaluation –
Date Regional Lymph Node Dissection - Mandatory field; must be numeric .in MM/DD/YYYY format
Nodes Positive – Mandatory field; must be numeric. Field defaults to ‘99’ for ‘Unknown’ but may be written over with any number less than or equal to the value entered in Nodes Examined. However, if Nodes Examined is zero, Nodes Positive mustbe 98. This field is linked to CS Extension and mustbe 00, 98, or 99 if stage is local or in situ. A Choice List is available.
Nodes Examined – Mandatory field; must be numeric. Field defaults to ‘99’ for ‘Unknown’ but may be written over with any number. A Choice List is available.
EOD Mets CS Mets at Diagnosis – Mandatory field; must be numeric. CS Mets Eval – Mandatory field; must be numeric.
CS Mets at DX – Bone; Mandatory field; a Choice List is available.
CS Mets at DX – Brain; Mandatory field; a Choice List is available.
CS Mets at DX – Liver; Mandatory field; a Choice List is available.
CS Mets at DX – Lung; Mandatory field; a Choice List is available.CS Site Specific Factor 1-25 – Mandatory fields; must be numeric. Field is linked to site and will default to ‘988’ whenever appropriate for that site’s CS schema.
Use the "Next" button, the F8 or the "Grade/SSDI" tab to go to the next page.
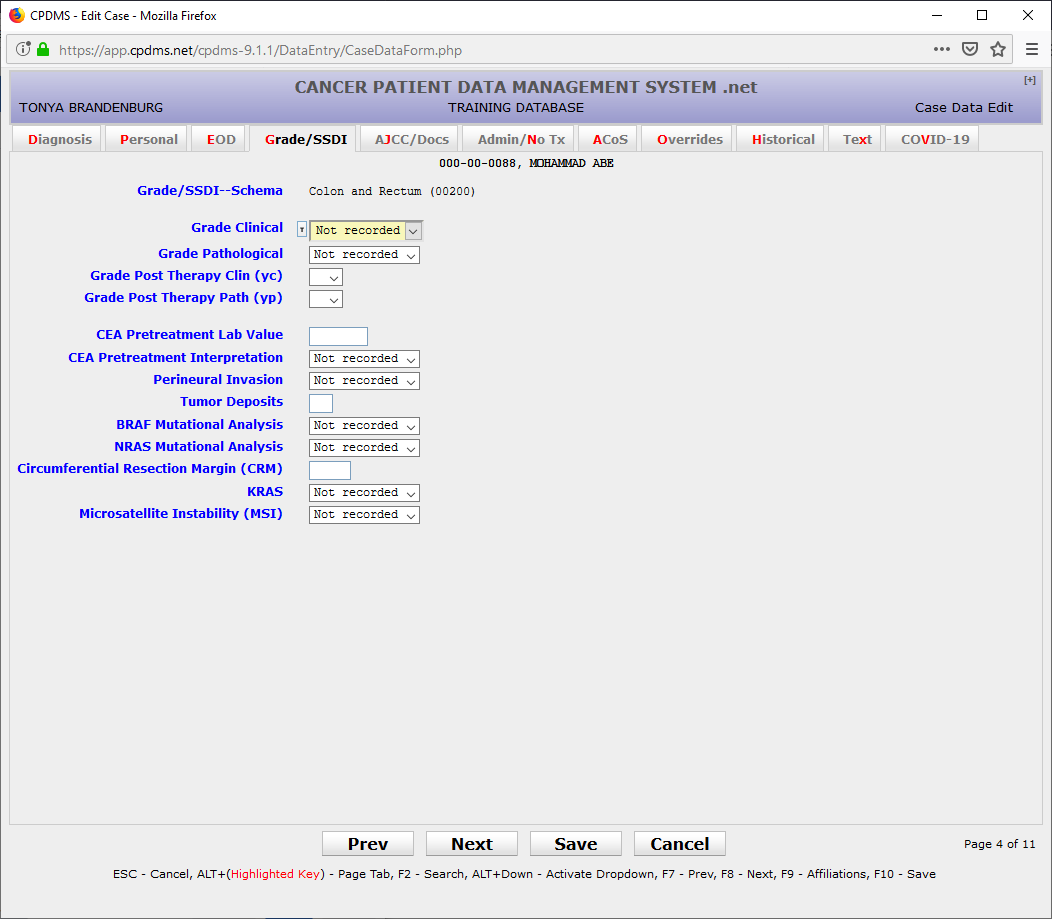
Grade Clinical - Mandatory field; refer to Grade Manual or SEER RSA
Grade Pathological - Mandatory field; refer to Grade Manual or SEER RSA
Grade Post Therapy Clin (yc) - Mandatory field; can be left blank; refer to Grade Manual or SEER RSA
Grade Post Therapy Path (yp) - Mandatory field; can be left blank; refer to Grade Manual or SEER RSA
SSDIs - Based on schema; Mandatory field(s); refer to SSDI Manual or SEER RSA
Use the “Next” button, the F8 key, or the “AJCC/Docs” tab to go to the next page.

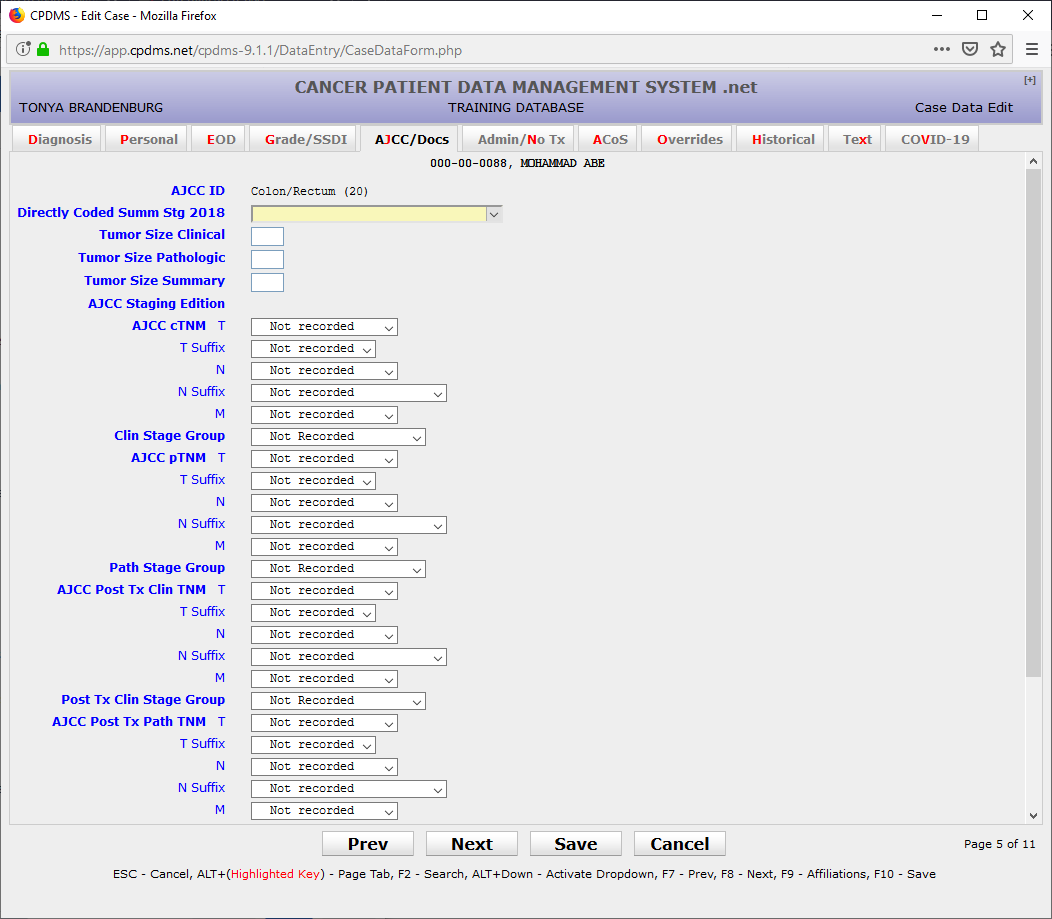
Directly Coded Summary Stage 20002018 – Mandatory field; a Choice List is available.
Refer to AJCC 8th/9th edition staging manual for current AJCC staging.
AJCC Staging Edition – Mandatory field; a Choice List is available. Field should be '8' when there is no AJCC staging for the site and histology combination in the current case. Entering '8' will auto-fill all of the AJCC fields with 8's.
AJCC cTNM Classification – Mandatory field. This is actually stored as three separate fields: the T valuevalue, T suffix, the N value, N suffix, and the M value. A Choice List is available for each.
AJCC cTNM Stage Group - Mandatory field; a Choice List is available.cTNM Descriptor – Optional field to be entered only if applicable
AJCC pTNM Classification – Mandatory field. This is actually stored as separate fields: the T value, T suffix, the N value, N suffix, and the M value. A Choice List is available for each.
Staged by- Clinical AJCC pTNM Stage Group – Mandatory field; a Choice List is available.
pTNM AJCC Post Tx Clin TNM Classification – Mandatory field. This is actually stored as three separate fields: the T value, T suffix, the N value, N suffix, and the M value. A Choice List is available for each.
pTNM AJCC Post Tx Clin TNM Stage Group – - Mandatory field; a Choice List is available.pTNM Descriptor – Optional field to be entered only if applicable
AJCC Post Tx Path TNM Classification – Mandatory field. This is actually stored as separate fields: the T value, T suffix, the N value, N suffix, and the M value. A Choice List is available for each.
Staged by- Pathologic – AJCC Post Tx Path TNM Stage Group - Mandatory field; a Choice List is available.
...
Use the "Next" button, the F8 key, or the "Admin/No Tx" tab to proceed to the next page.

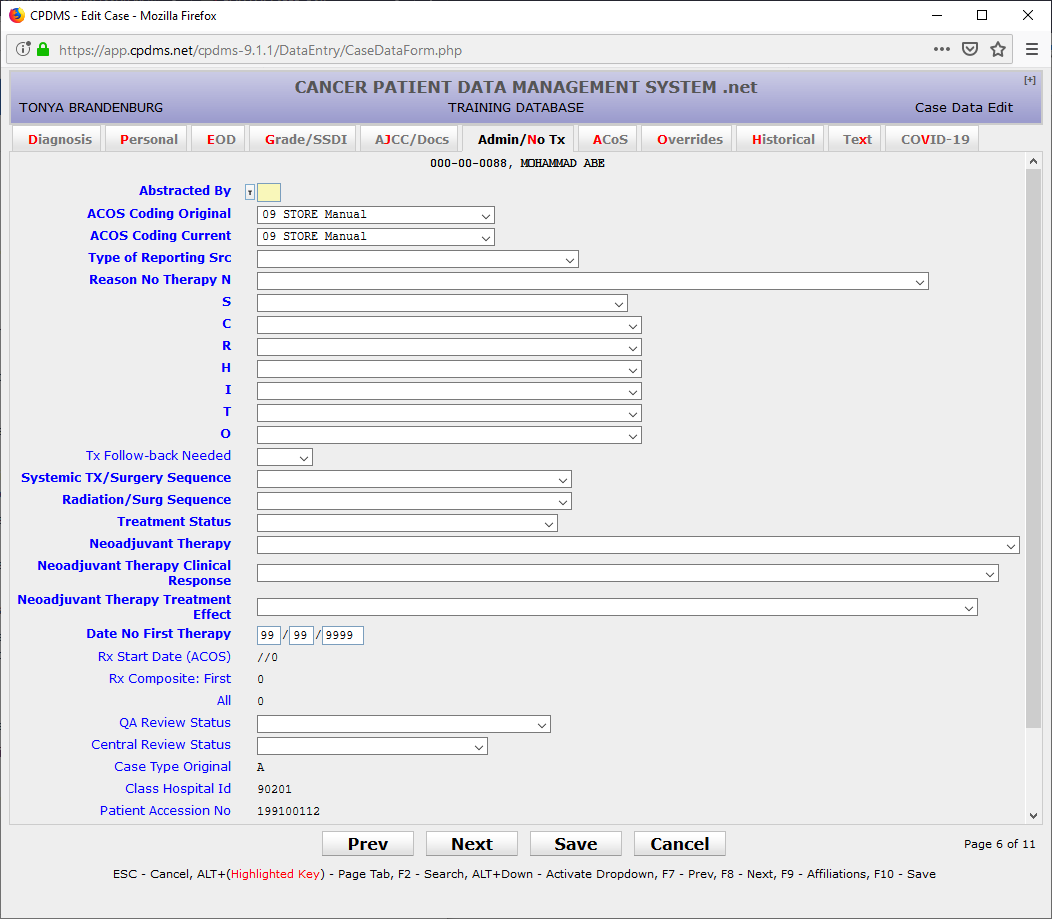
Abstracted By – Mandatory field; alphanumeric characters allowed.
...
Systemic Tx/Surgery Sequence – Mandatory field; a Choice List is available.
Radiation/Surg Sequence - Mandatory field; a Choice List is available.
Treatment Status - Mandatory field; a Choice List is available.
Neoadjuvant Therapy - Mandatory field; a Choice List is available.
Neoadjuvant Therapy Clinical Response - Mandatory field; a Choice List is available.
Neoadjuvant Therapy Treatment Effect - Mandatory field; a Choice List is available.
...
Use the “Next” button, the F8 key, or the “Overrides” tab to proceed to the next page.

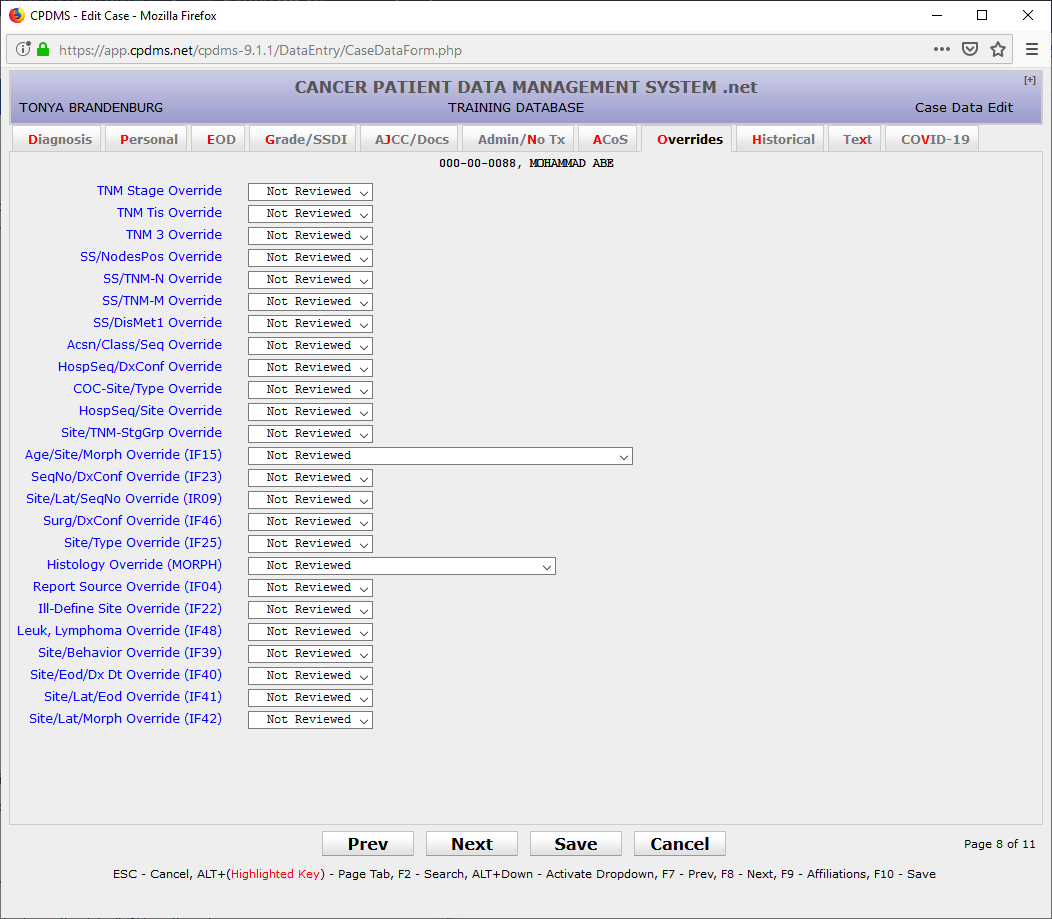
Overrides – Optional fields; used only by hospitals that submit data to NCDB and by the central registry. Override flags are used to indicate that a record with apparently inconsistent or unlikely data has been reviewed and is in fact correct as coded. There are 22 override flags available which correspond to various inter-field and inter-record edit checks. A Choice List is available for each one. These fields default to zero. Consult the CPDMS Abstractor’s Manual for further information regarding overrides.
...
Use the “Next” button, the F8 key, or the “Historical” tab to proceed to the next page.

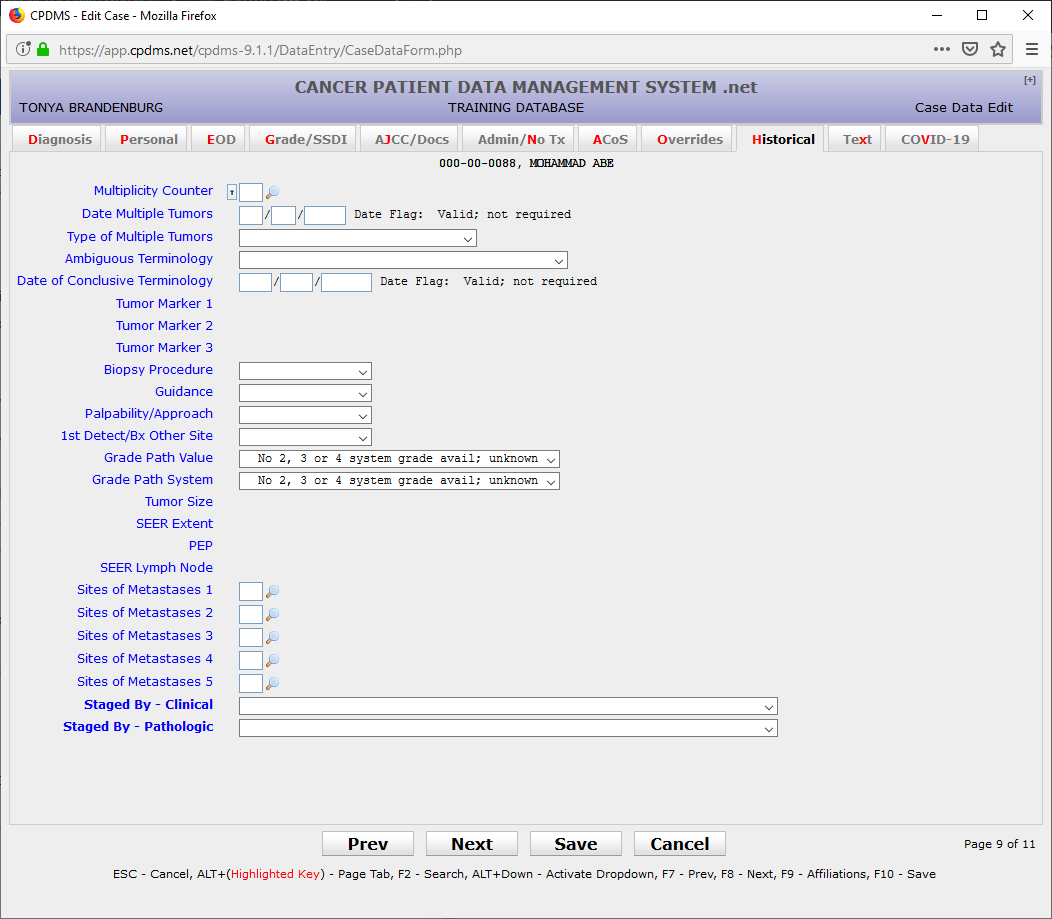
Multiplicity Counter – Mandatory field for cases diagnosed after 1/1/2007 and before 1/1/2013; this field is numeric and must be two digits.
...
SEER Lymph Node – Mandatory field for cases diagnosed prior to 2004; only numeric characters allowed.
Sites of Metastasis 1-5 – Optional fields; must be numeric. A Choice List 1-5 – Optional fields; must be numeric. A Choice List is available.
Staged By - Clinical - Mandatory field for cases diagnosed prior to 2018. A choice list is available.
Staged By - Pathological - Mandatory field for cases diagnosed prior to 2018. A choice list is available.
NOTE: The Case Data Edit Form may be abandoned at any time without saving by pressing ESC or selecting the ‘Cancel’ button. The form can be exited and any changes saved by using the ‘Save’ button or the F10 key.
...
NOTE: All Case Therapy Edit Forms may be abandoned at any time during editing without saving by pressing ESC or selecting the ‘Cancel’ button. Use the ‘Save’ button or the F10 key to exit the form and save any changes.

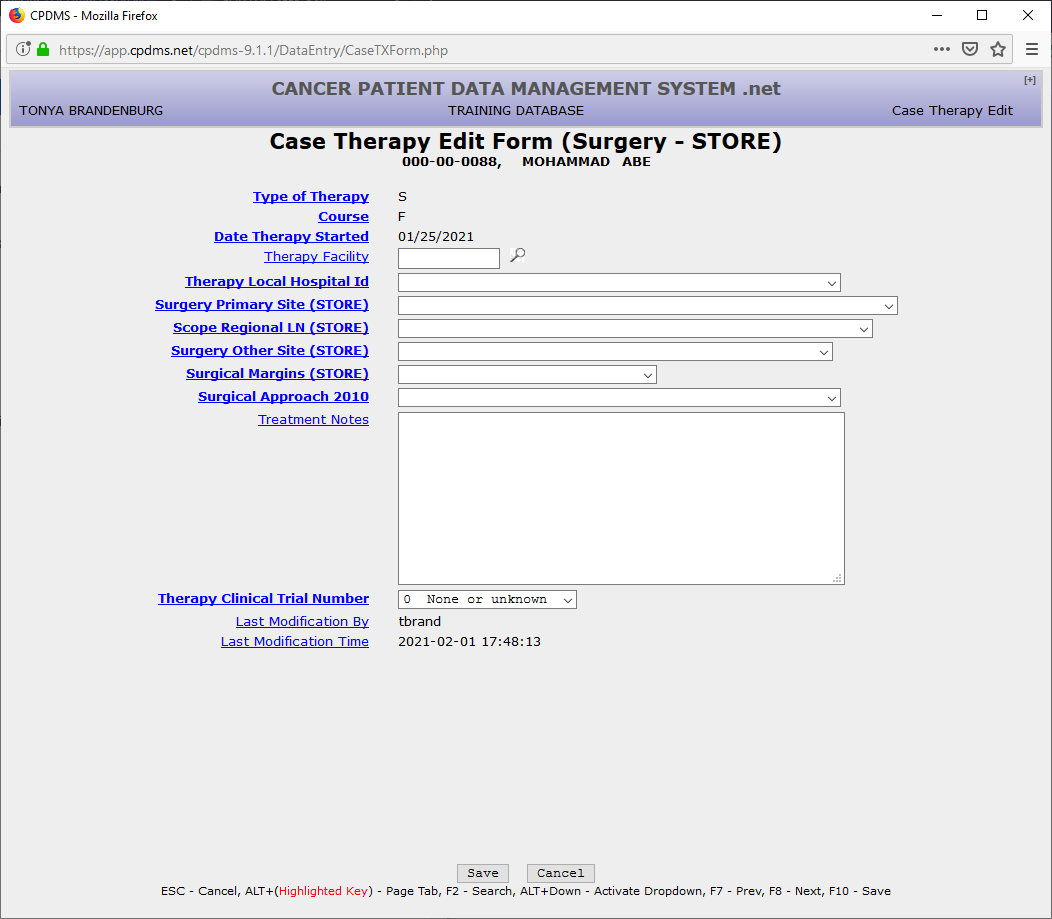
The fields that are present in the Case Therapy Edit Form will vary depending upon the type of therapy. The screen seen above is for surgical therapy.
Therapy Facility – Optional field; a Support File functions as a Choice List. Therapy Local Hospital Id – Mandatory field; a Choice List is available.
Surgery Primary Site (FORDSSTORE) – Mandatory field; no Choice List is available. Consult Appendix G of the Abstractor’s Manual for the appropriate code. A code validation list exists that has been linked to the topography code so that only relevant surgical codes may be entered.
Scope Regional LN (FORDSSTORE) – Mandatory field; a Choice List based on topography code is available.
Surgery Other Site (FORDSSTORE) – Mandatory field; a Choice List based on topography code is available.
Surgical Margins (FORDSSTORE) – Mandatory field; a Choice List based on topography code is available.
...
A confirmation screen is now displayed.

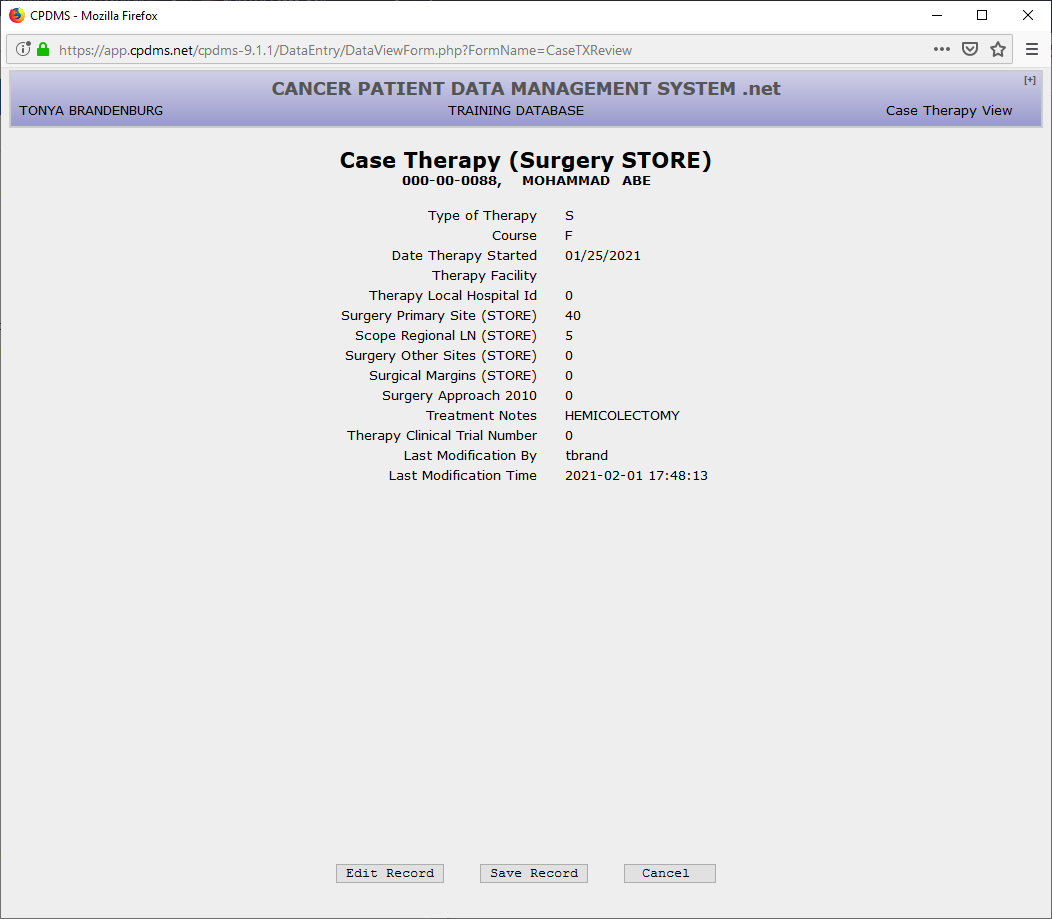
Select “Edit Record” to modify the data that has been entered or “Cancel” to escape without saving the data. Choose “Save Record” to create a case therapy.
There is no limit to the number of therapies that may be created for a patient. Below is an example screen for Radiation Therapy.

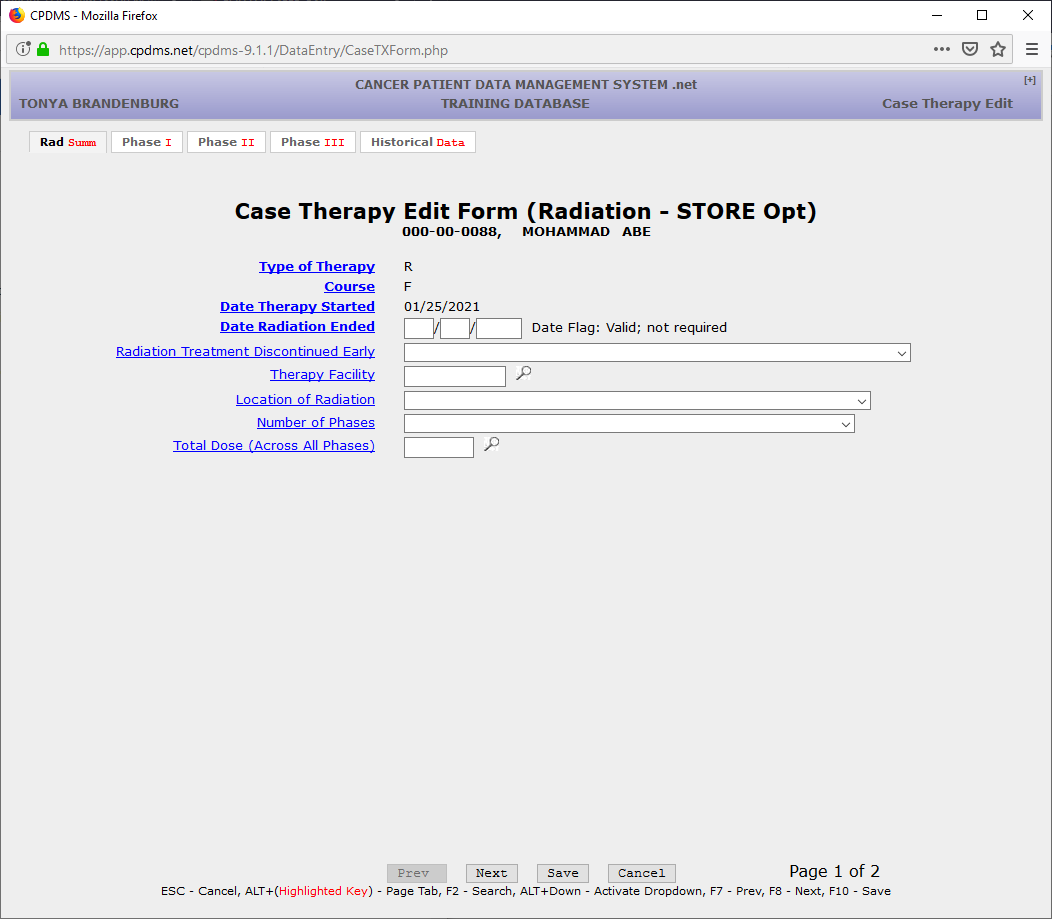
Date Radiation Ended – Mandatory field for ACoS flagged hospitals; must be a valid date on or after Date Therapy Started. It must be entered as MMDDYYYY.
Radiation Treatment Discontinued Early – Mandatory field for ACoS flagged hospitals; a Choice List is available.
Therapy Facility – Mandatory field for ACoS flagged hospitalsTherapy Facility – Optional field; a Support File functions as a Choice List. Therapy Local Hospital Id – Mandatory field; a Choice List is available.
Location of Radiation Therapy Code – Calculated Mandatory field ; cannot be entered by the user.for ACoS flagged hospitals; a Choice List is available.
Number of Phases – Mandatory field for ACoS flagged hospitalsRadiation Sites – Optional field; a Choice List is available.Total
Rads – Optional field; total rads received in numeric charactersTotal Dose (Across All Phases) – Mandatory field for ACoS flagged hospitals; must be numberical.
Use F8 or the ‘Next’ button to go on to the next page, or use the “Page 2” “Phase I” tab.

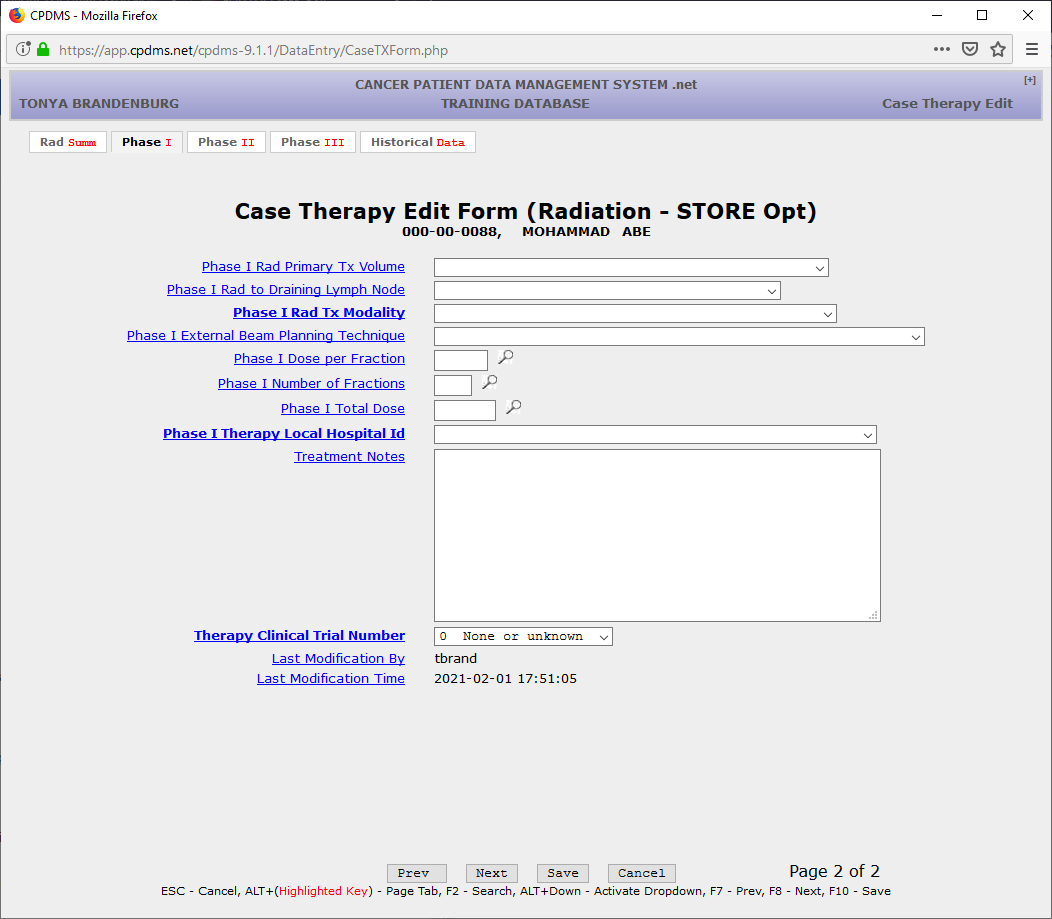
Phase I Rad Primary Tx Volume Location of Radiation – Mandatory field for ACoS flagged hospitals; a Choice List is available.Rad Treatment Volume
Phase I Rad to Draining Lymph Node – Mandatory field for ACoS flagged hospitals; a Choice List is available.Regional Tx. Modality
Phase I Rad Tx Modality Modality – Mandatory field for ACoS flagged hospitals; a Choice List is available.
Phase I External Beam Planning Technique – Mandatory field for ACoS flagged hospitals; a Choice List is available. Boost Tx Modality-- Mandatory field for ACoS flagged hospitals; a Choice List is available.
Phase I Dose per Fraction – Mandatory field for ACoS flagged hospitals; a Choice List is available. Boost Tx Modality-- Mandatory field for ACoS flagged hospitals; a Choice List is available.
Phase I Number of Fractions Regional Dose – Mandatory field for ACoS flagged hospitals; a Choice List is available. Boost Tx Modality-- Mandatory field for ACoS flagged hospitals; a Choice List is available.
Boost Phase I Total Dose - – Mandatory field for ACoS flagged hospitals; a Choice List is available. Num Treatments This Volume Boost Tx Modality-- Mandatory field for ACoS flagged hospitals; a Choice List is available.Date Radiation Ended
Phase I Therapy Local Hospital ID – Mandatory field for ACoS flagged hospitals; must be a valid date on or after Date Therapy Started. It must be entered as MMDDYYYYa Choice List is available.
If a patient has a Phase II, Phase III radiation you can input those fields in the next tabs.
Treatment Notes – Optional field; any alphanumeric or special characters are allowed.
...
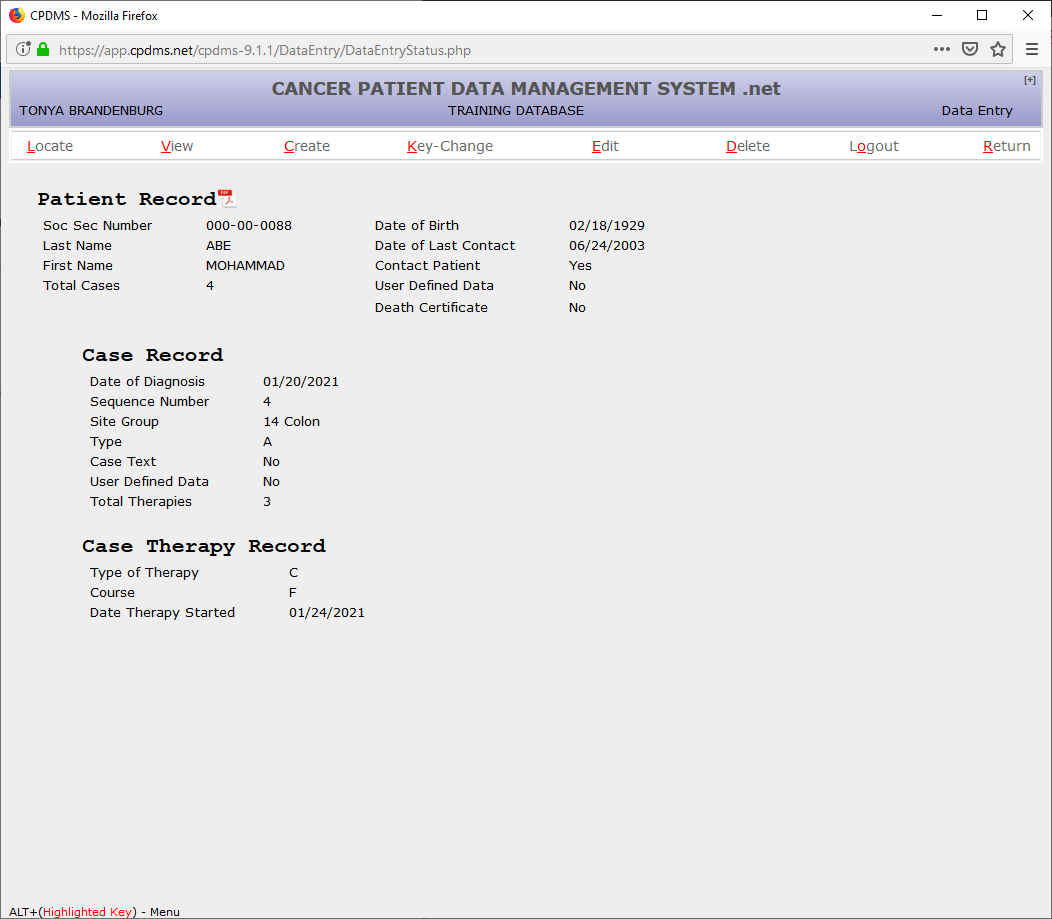
After a therapy is exited, the system returns to the Data Entry Status screen. The key fields for the last therapy entered or viewed are now displayed beneath the Case Record. The total number of therapy records stored for this case is shown in the last line of the Case Record.
The next data items on the CPDMS Abstract Form are the case level user defined fields. Like the patient level user defined fields, these items may be recorded by choosing CREATE, User Defined, and then Case (see below).

The Case User Defined Data Form is seen below:
...
To continue entering data related to the current case, move the cursor to CREATE and select ‘Follow-up.’ The following screen appears:

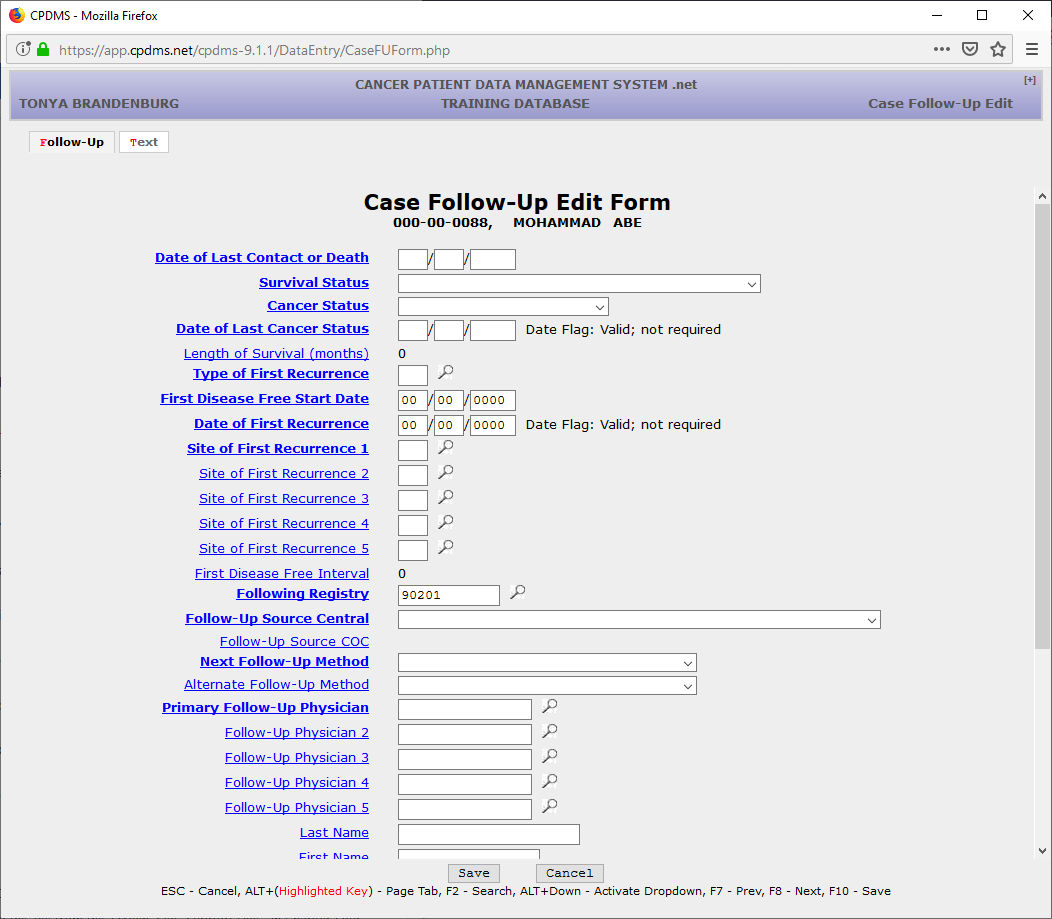
Note that the length of this edit form exceeds the size of the default window, so the scroll bar must be used to view additional fields at the bottom of the page. Text may be added at any time by clicking on the “Text” tab or using ALT + T.
...
Cancer Status – Mandatory field; a Choice List is available.
Date of Last Cancer Status – Mandatory field; must be a valid date; entered as MMDDYYYY. The date of last contact must be greater than or equal to the diagnosis date.
Length of Survival (months) – Calculated field; cannot be entered by the user. The cursor will not go to this field; however, it is displayed for informational purposes and it is available for data analysis.
...
If “Save” is chosen, the Case Follow-Up record will be displayed, as seen below.

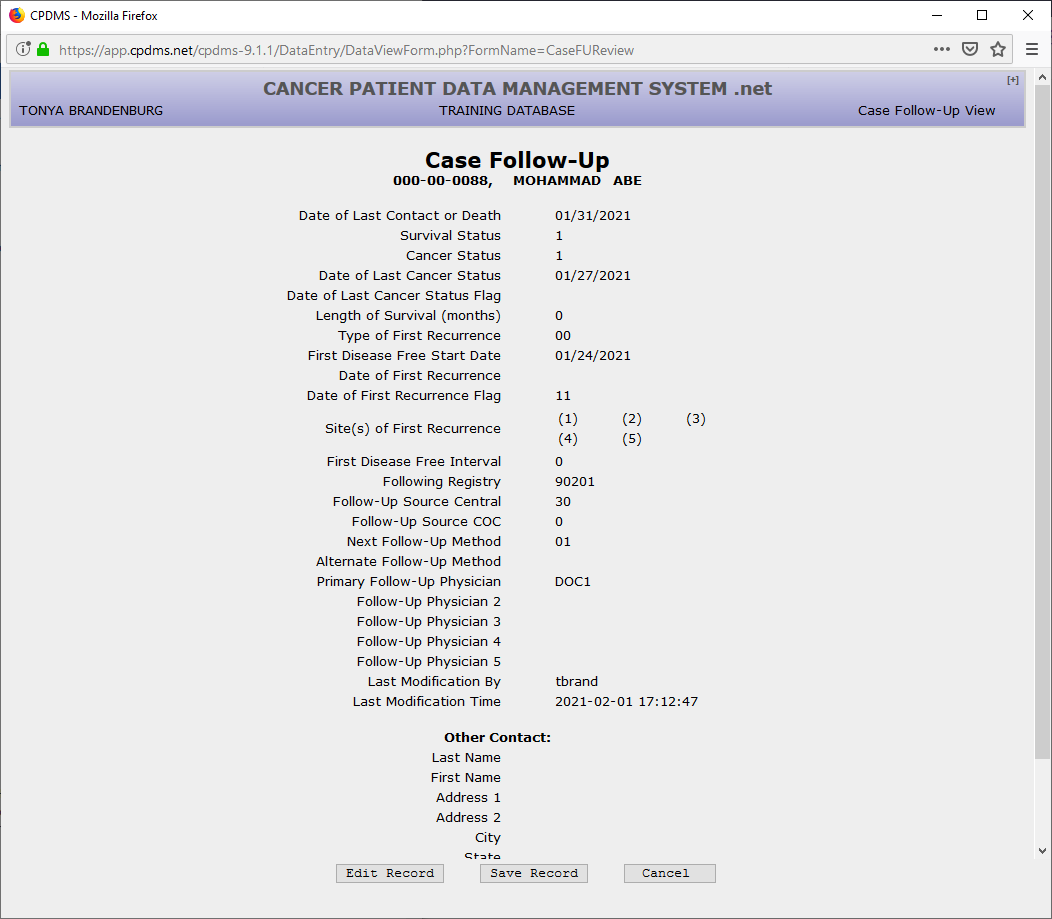
Hit ENTER to accept “Save Record,” or select “Edit Record” to return to the edit form. Choose “Cancel” to escape without saving the record.
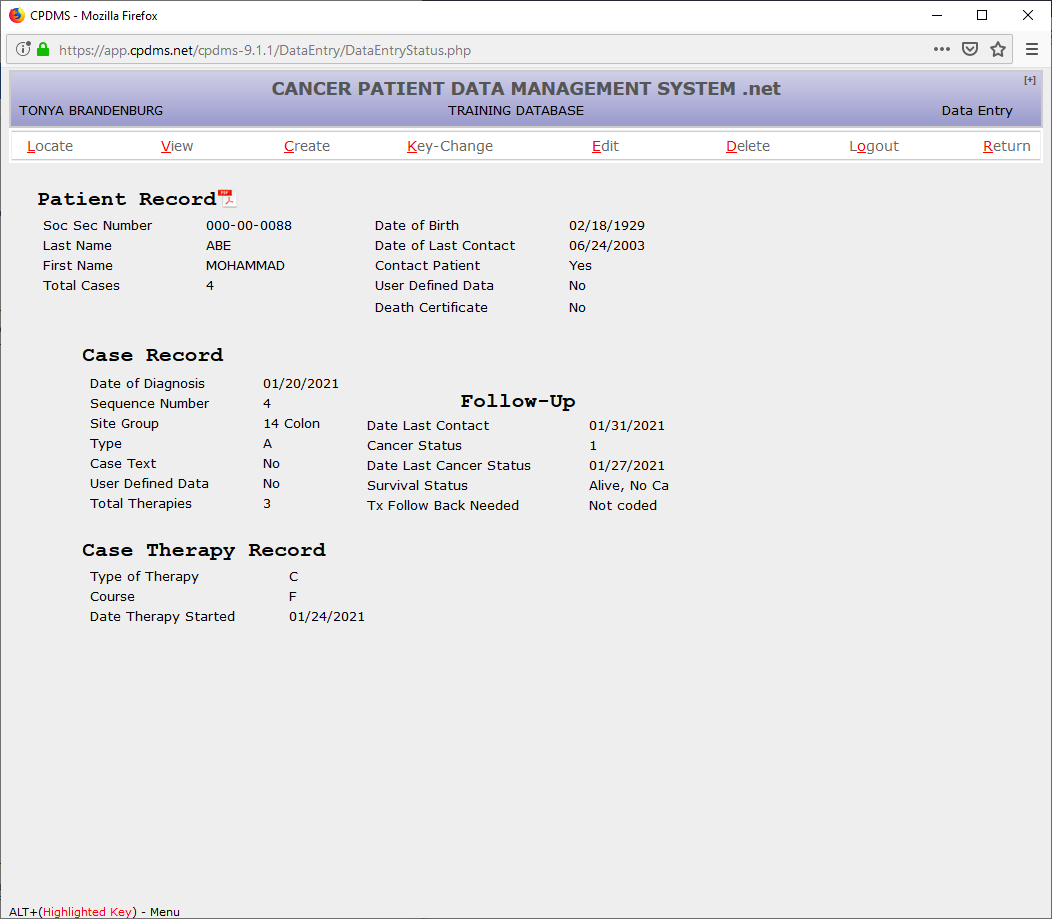
After the follow-up record has been created and saved, the screen returns to the Data Entry Status screen. Notice that now the follow-up key fields appear to the right of the Case Record.

To complete data entry for this abstract, choose CREATE and then “Text.” Text is divided into ten separate categories: History and Physical, X-rays and Scans, Scopes, Lab Tests, Operative Reports, Pathology Reports, Site Text, Histology Text, Staging Text, and General Remarks. A category is selected by clicking on the corresponding bar in the list on the right of the screen. The category for which text is being entered appears at the top of the text entry box. Each category has guidelines for essential data which should be documented in text; these appear to the left of the text entry box (see below).

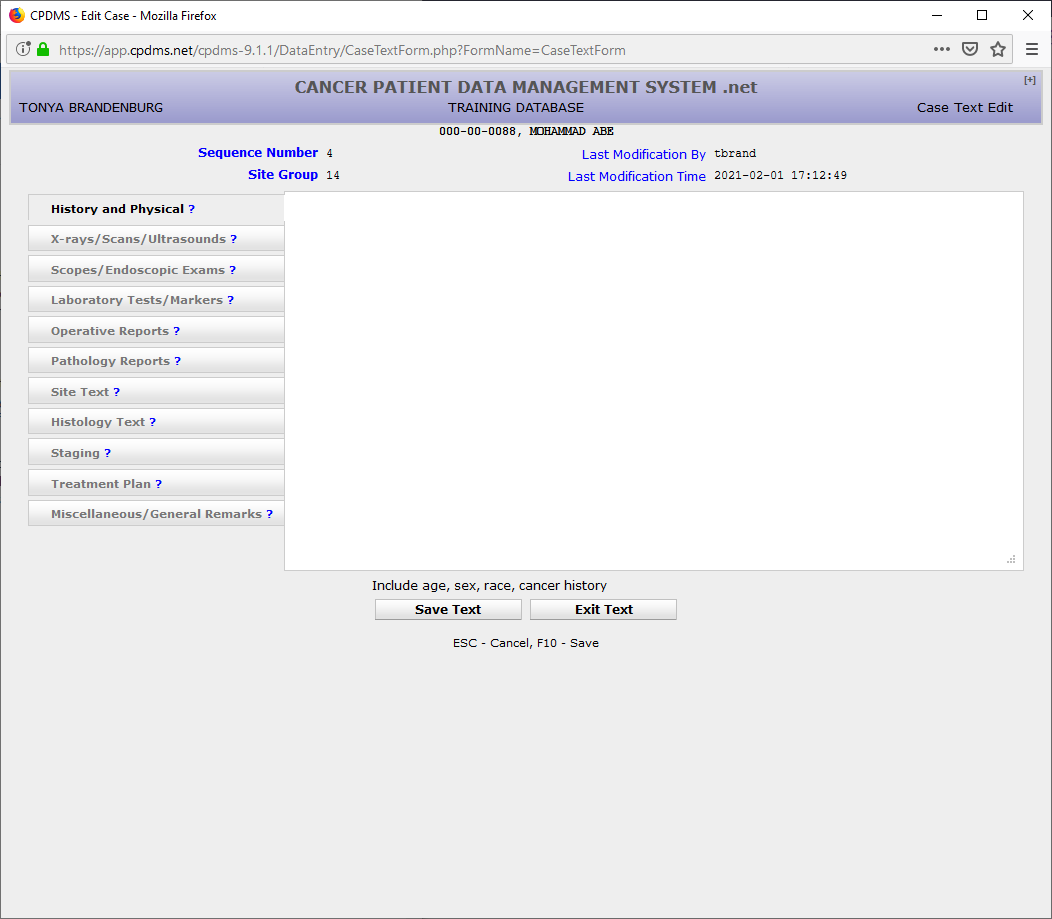
Text may be entered in as many or as few categories as necessary. Up to 3360 characters may be entered for each category. Refer to the CPDMS Abstractor’s Manual for further guidance regarding text entry. Text from other applications (such as Word or another window of Internet Explorer) may be cut and pasted into CPDMS.net. After text data entry is completed, select “Save Text” or press F10. As with other segments of the case, the username and date last modified fields are automatically recorded each time the text is updated. Click “Exit Text” or ESC to exit without saving.
...
To change keys in the current case record, select "Case" from the KEY CHANGE submenu and the Case Key Change Form will be displayed:
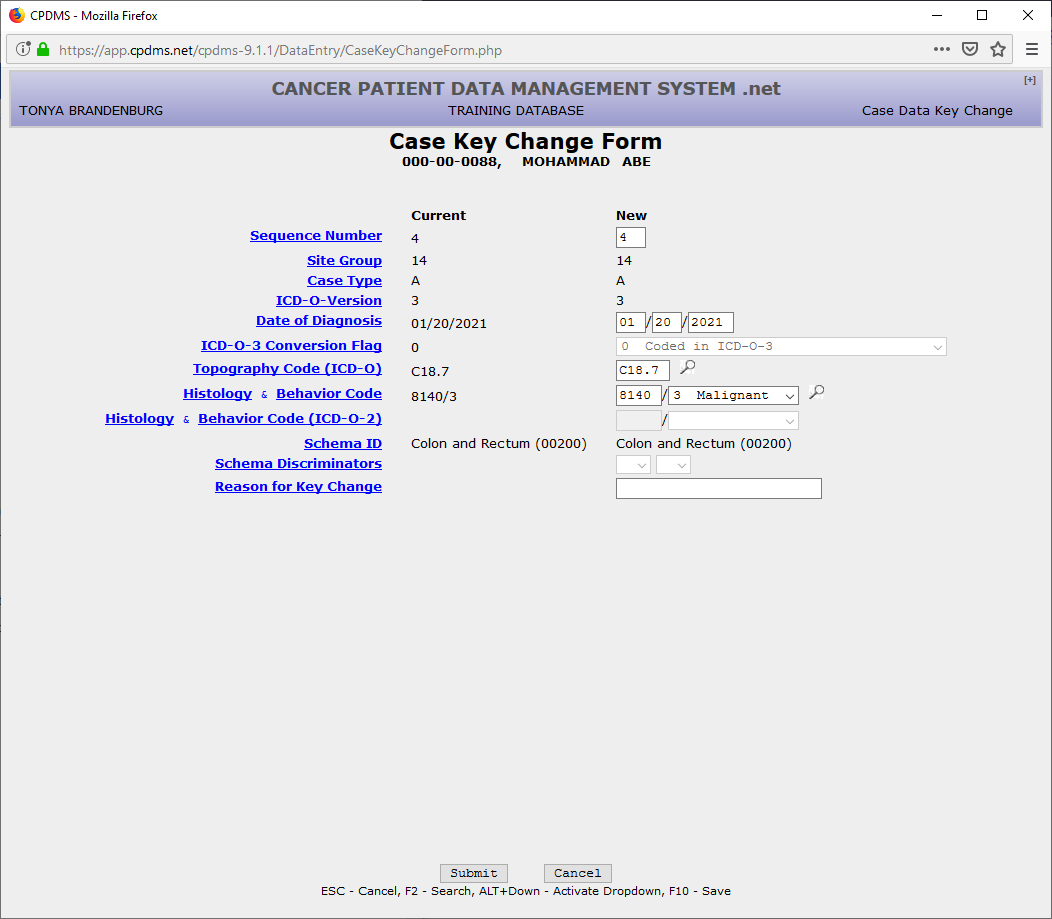

This form allows the case sequence number, date of diagnosis, ICD-O-3 conversion flag, topography, or histology and behavior code to be edited. The "Reason for Key Change" field allows a brief explanation (up to 120 characters) of the impetus for the key change to be recorded. Select "Submit" to save the changes or "Cancel" to escape without saving.
If "Submit" is chosen, the screen will display the current and new key case fields side by side, so that the changes may be reviewed prior to saving. (See example below.)

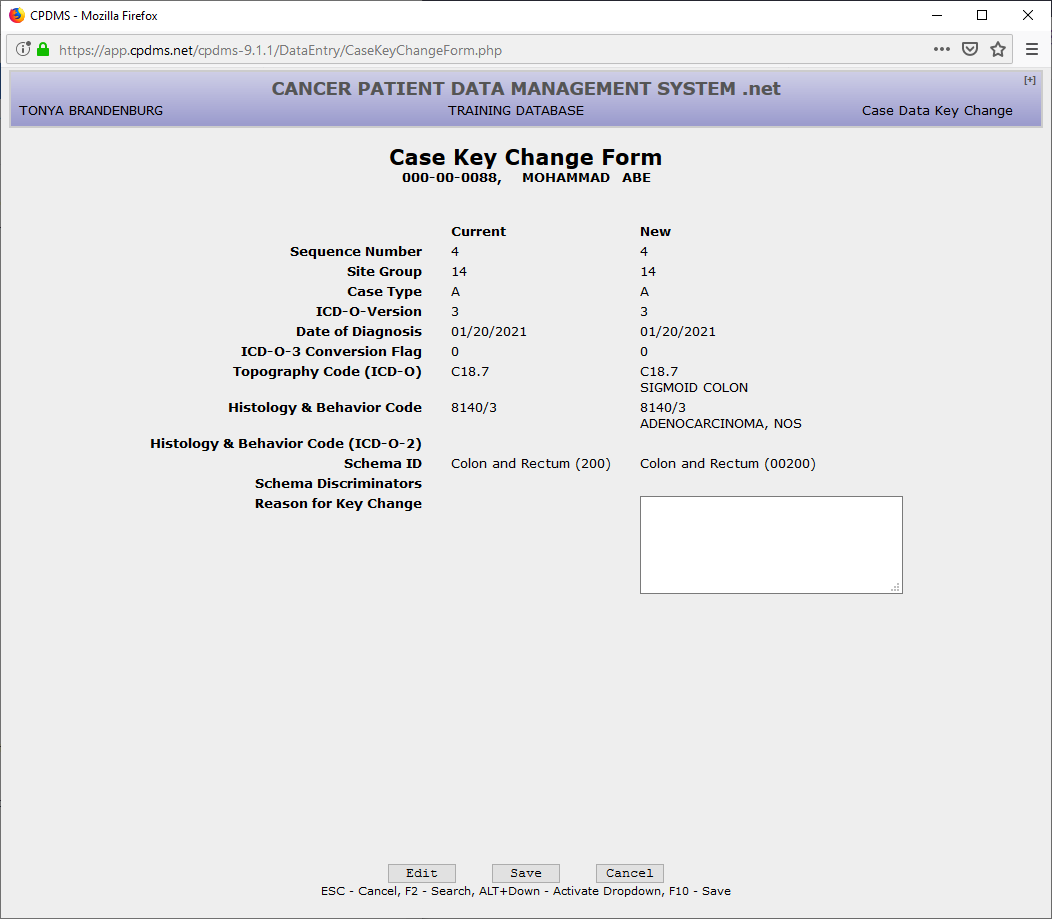
Select "Edit" to return to editing the case keys, "Save" to preserve the changes, and "Cancel" to return to the Patient Record display without saving the changes.
...