The CPDMS.net Operator's Manual is written to provide detailed instructions for entering, storing, retrieving, and analyzing the cancer patient data collected by an institution. It is a companion reference to the CPDMS Abstractor's Manual, which provides detailed instructions for abstracting and coding cancer registry data.
This manual is organized into chapters and sections which correspond to the system menus and operations. Each chapter numbered one through five describes the CPDMS.net operation carried out by selection of that option from the Main Menu. Sections within chapters are also organized in accordance with option selections from subsequent menus. These chapters are followed by a comprehensive list of system generated error messages, a glossary of special terms, a section specifically for multi hospital installation, and some guidelines for hospitals with multiple users of CPDMS.net.
Prior to connecting to CPDMS.net for the first time, users must first register their hospital network gateway IP address with KCR and download a client certificate via KCR's secure file exchange web site. Each user will be assigned a unique username and password by KCR IT staff. Access for request must be requested from your regional coordinator and they will send the request to the CPDMS.net support team.
Initiating CPDMS.net
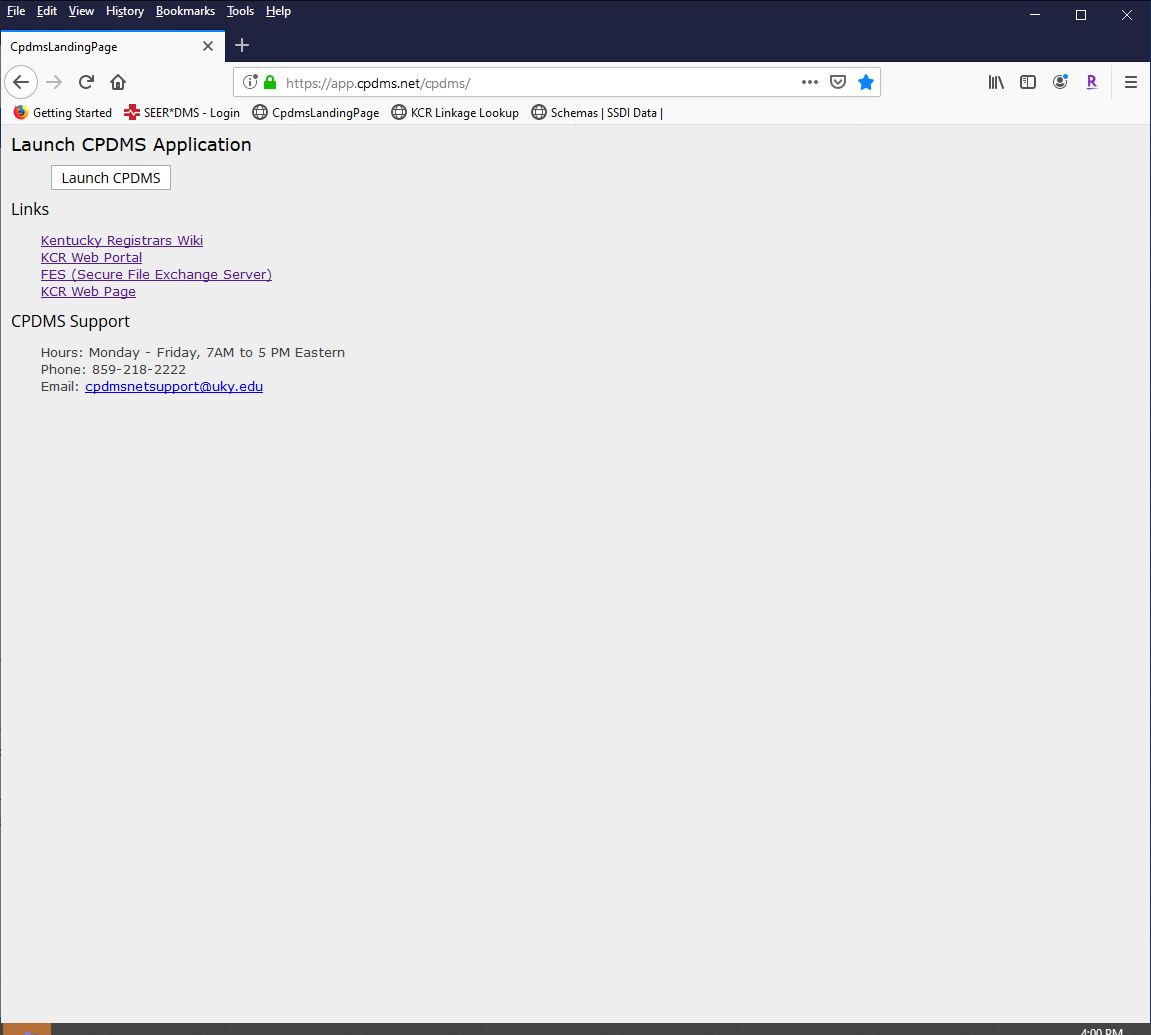
From the Windows desktop, open Internet Explorer 11 or Firefox ESR and enter the URL https://app.cpdms.net/cpdms/. The following page will open:
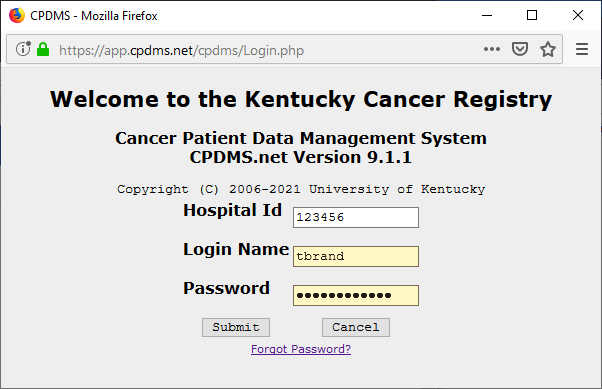
Click the "LOGIN" button and a new CPDMS login window will open. (CPDMS.net requires that any pop-up blocking application in your browser allows pop-ups for app.CPDMS.net.)
Earlier Microsoft Edge, Firefox, or other types of web browsers are not supported.
Enter the hospital ID, login name and password (both provided by KCR), and click the "Submit" button.
Once this information has been submitted, users at multi-hospital institutions will be prompted to select the user hospital before continuing. See Appendix C for instructions regarding logging into a multi-hospital database.
It is important to note that when a user is logged into app.CPDMS.net and the program is left idle, (defined as failing to submit a data entry page or select a new menu option for 75 minutes) the program will automatically suspend the session and perform a log out. This is a security feature designed to prevent unauthorized users from accessing confidential data on an unattended computer. If an automatic log out occurs, simply log back in and the active session will resume. See the section entitled "app.CPDMS.net Sessions" for more detailed instructions about resuming an active session.
Following authentication, the app.CPDMS.net Main Menu will be displayed. The user's login name appears in the banner at the top of the page in the lower left corner, while the institution name is shown in the middle of the banner. In the example shown below, the user "Tonya Brandenburg" is logged into the database of the facility "Training Database." The lower right corner of the banner displays the title of the current screen. 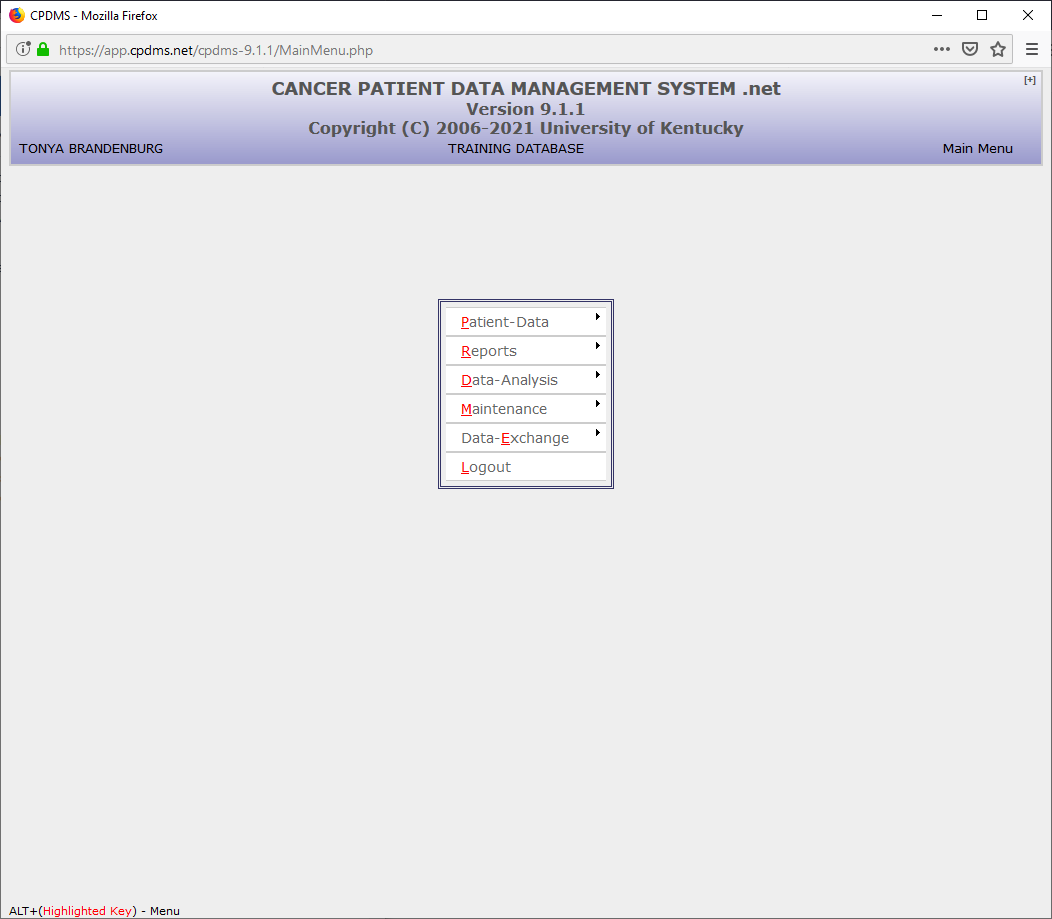
Navigating Menus
In order to select a particular menu option from the Main Menu, use the mouse to move the cursor over the desired option and a submenu will appear. [Logout is the exception; it has no submenu and is simply highlighted when the cursor is placed on it.] The menu may also be navigated with the keyboard through the use of "hot keys." The hot key for each menu item is indicated by an underlined red letter in the title. A menu option may be selected by simultaneously pressing the ALT key and the hot key for that particular option. For example, in the screen below, the hot key for Patient Data is "P." When ALT + P are pressed, Patient
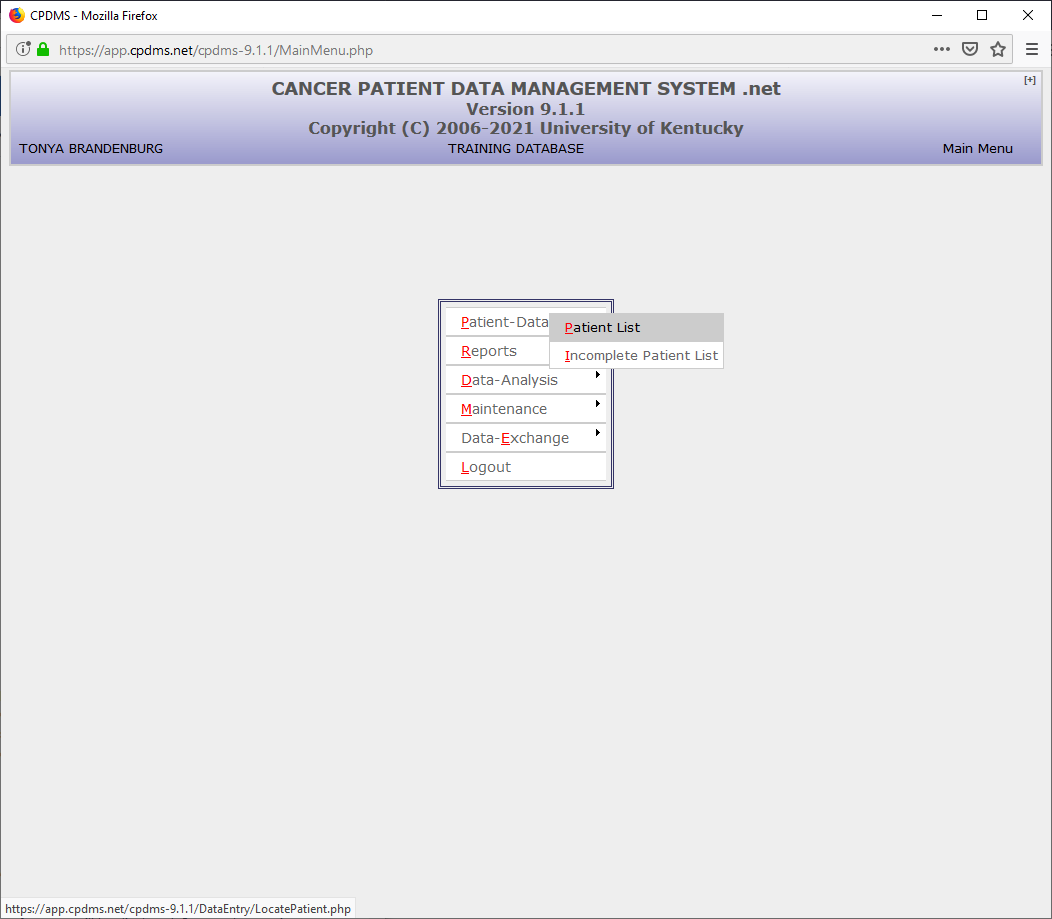
Data is selected and its submenu appears.
The status bar (located at the bottom of the active window) contains "hints" for navigating the current menu. In the above screen, for example, the status bar reads "ALT + (Highlighted Key) – Menu."
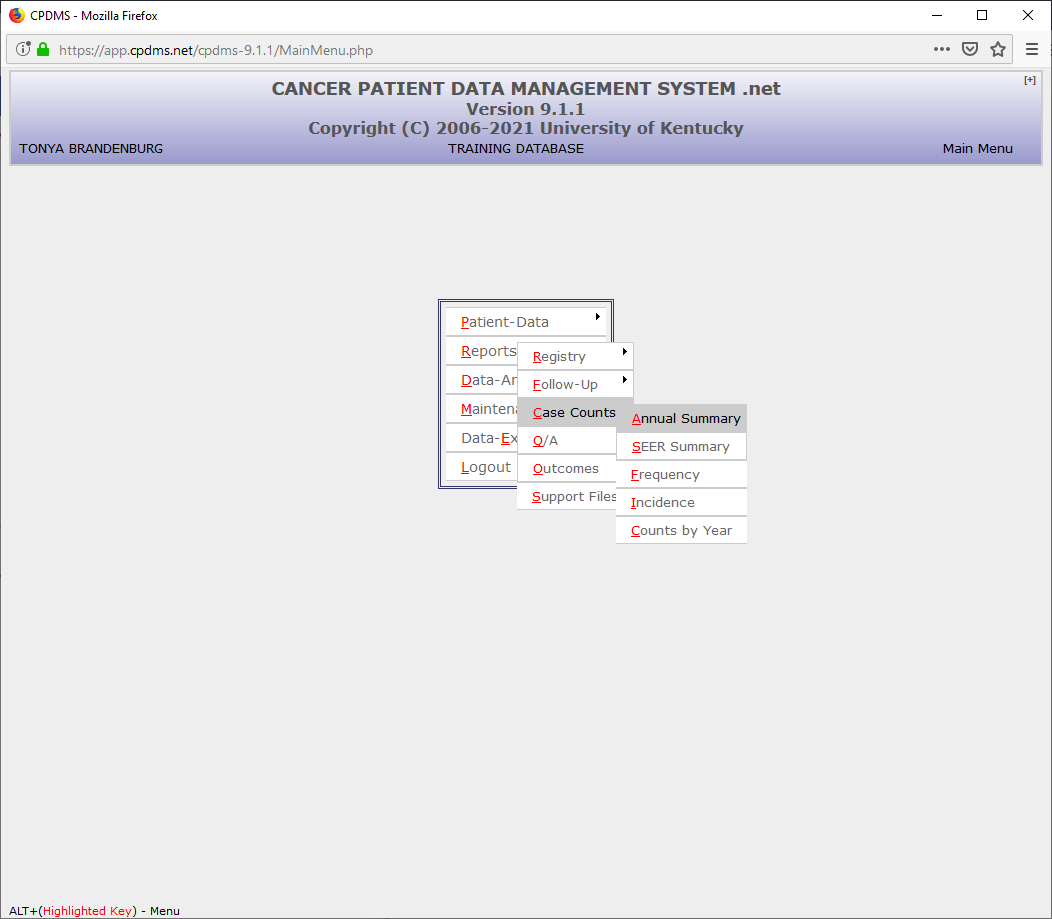
Most Main Menu items contain a submenu. For example, if "Reports" is highlighted, a submenu listing the various types of reports will be displayed. Some submenu items have an arrow to the right, indicating that there is a further submenu within that item (see below).

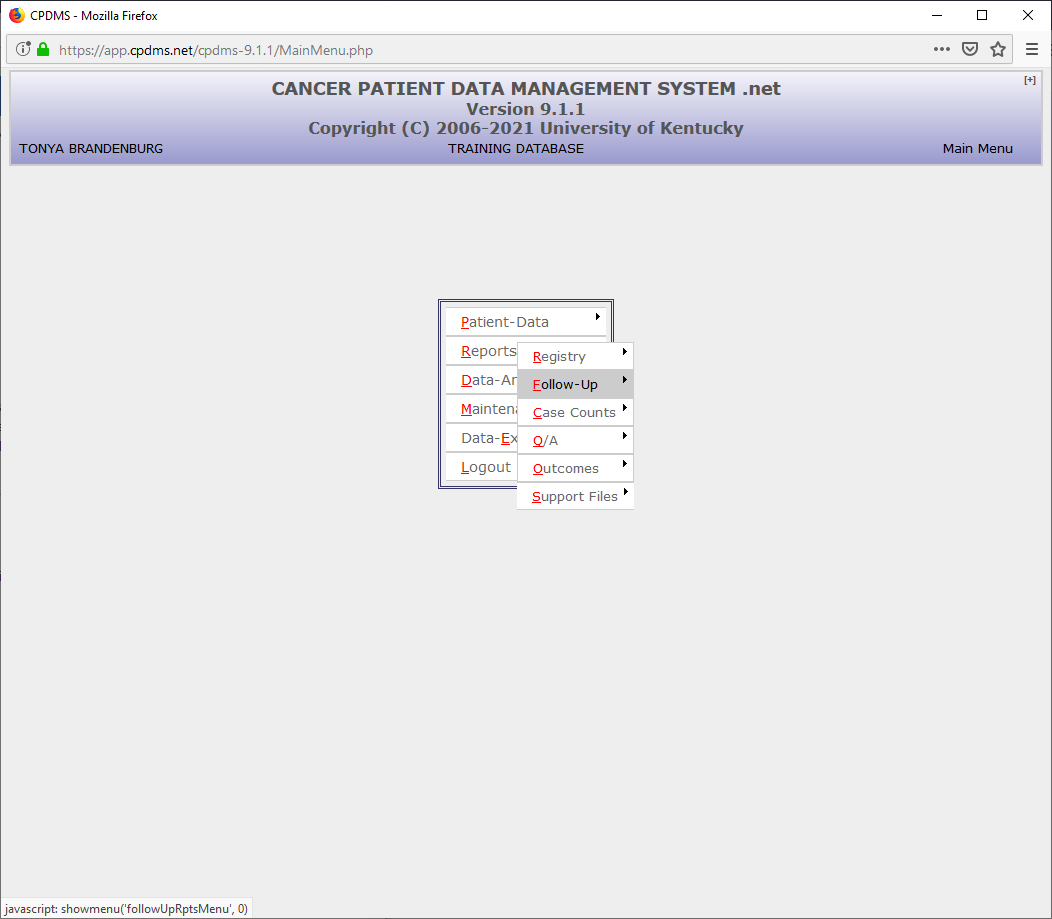
As seen above, within the Reports submenu, various types of reports may be selected, including Registry, Follow-Up, Case Counts, Q/A, Outcomes, and Support Files. As the cursor is moved down the Reports menu, the submenus appear when an item is highlighted. In the example above, the Case Counts reports include Annual Summary, SEER Summary, Frequency, Incidence, and Counts by Year. The desired report may be selected by moving the cursor to highlight that option and left-clicking the mouse.
Hot keys can also be used to navigate within submenus. As in the Main Menu, hot keys are indicated by an underlined letter in the name of the menu item. It is not necessary to press ALT with submenu hot keys; simply press the key corresponding to the underlined letter to highlight that option. In the example below, pressing "F" within the Reports submenu highlights Follow-Up.
Once the desired submenu option is highlighted, press ENTER to select it. In the example below, by pressing ENTER while Summary is highlighted, the Summary report is selected.
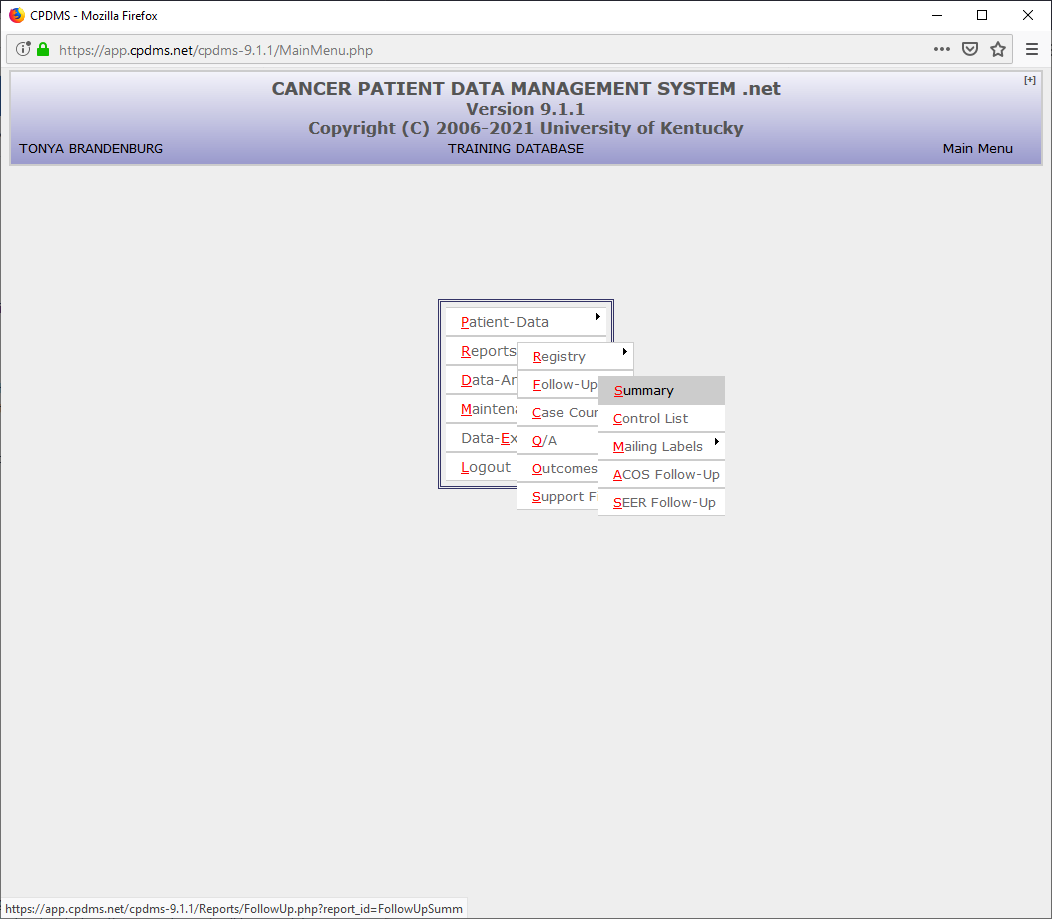
The submenu may be navigated using the up and down arrow keys or the hot keys. Once the desired option is highlighted, press ENTER.
app.CPDMS.net may also be exited entirely from the Main Menu. Simply select Logout, the session will be terminated, and the window will close.
app.CPDMS.net Sessions
In the event that a app.CPDMS.net session times out or is inadvertently terminated, the session may be recovered by launching Internet Explorer and logging in normally. After logging in, a message will be displayed indicating that an active session has been recovered.
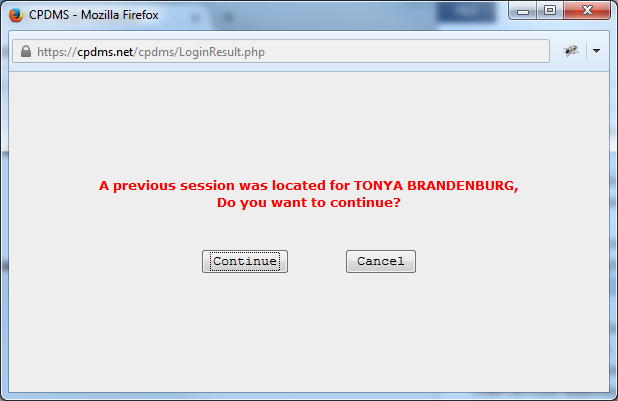
Choose "Continue" and app.CPDMS.net will automatically return to the record that was active prior to logout. If a multi-page data entry form (i.e., Case Data Edit Form, Patient Data Edit Form, etc.) was being edited when logout occurred, all data which had been entered up to the current page (but not including the current page) will be saved. For example, if page four of the Case Data Edit Form had been partially completed when the session was terminated, when the active session is resumed, app.CPDMS.net will automatically return to page four of that patient's form. All data items that had been completed on pages one through three will have been saved, but page four will be blank and any data that had been entered must be entered again. This feature of app.CPDMS.net ensures that if a session is terminated during data entry without logging out properly, the maximum amount of information that can ever be lost is a single data entry page.
User Defined Fields
If desired, user defined variables at the patient or case level can be assigned. As shown in the Abstractor's Manual, there are ten available fields at the patient level for each institution to define according to its own information needs. There are also twenty user defined fields available for each site group that individual institutions may use to record site specific diagnostic, therapeutic, or clinical information at the case level that is not recorded elsewhere. In order to assign labels to the user defined variables in the computer, select Maintenance from the Main Menu and then User Defined from the submenu. See the section entitled "User Defined Labels" in Chapter Four of this manual for detailed instructions for performing this function.