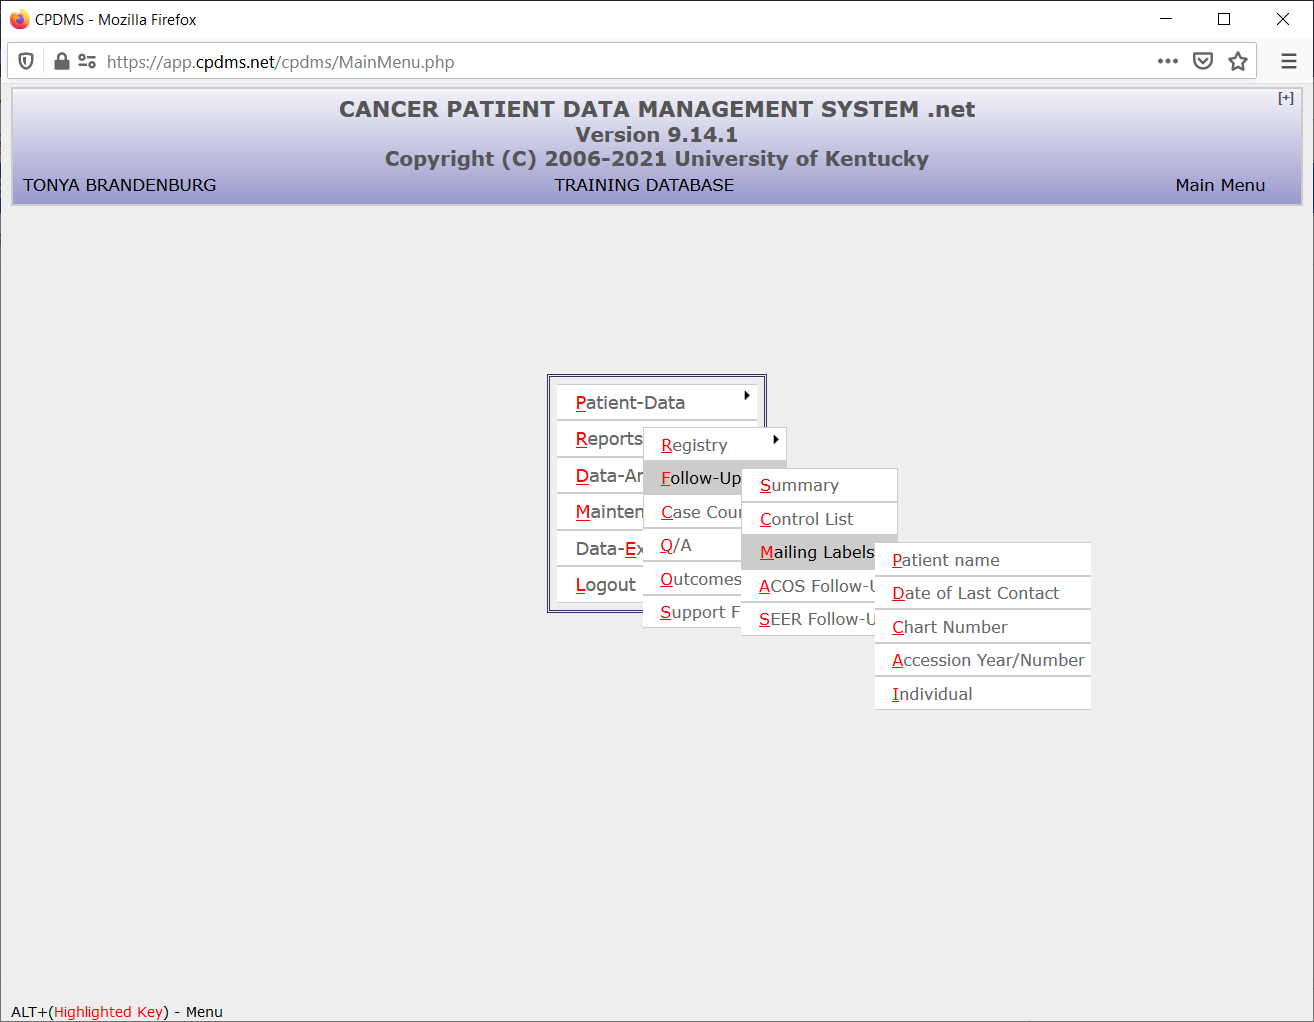
From the Reports submenu, create the desired label type (Follow-up, Patient, etc.). The labels will then be displayed, as seen in the example below:


Note: Once labels have been generated by CPDMS.net and saved to a user's computer, the file may be manipulated and printed using any type of spreadsheet and/or word processing software. However, KCR only supports label printing using Microsoft® Excel and Microsoft® Word.
Choose the "Save" button and a dialog box will appear with the default filename "Labels.csv" and "comma separated" as the specified file format. The filename may be changed to whatever you wish, but be sure to preserve the .csv extension.

Select "Submit" and then "Save" to save the file to the desired location on your own computer or network drive. In the screen below, for example, the file is saved to the user's computer desktop.

Once the file has been saved to your computer, open it using Excel. In Excel, click the Office Button (in the top left corner) and choose "Save As" and "Excel Workbook." A dialog box will open. At this point, you can choose where to save the file and assign a different name if you wish. Once you have specified a location and name, hit "Save" and close Excel.

Now open Microsoft Word, click the "Mailings" tab, then "Start Mail Merge" and "Labels."

The label options dialog box is now displayed.

Select the type of printer and labels you wish to use. When choosing label size and shape, keep in mind the number of lines which will be displayed. Some labels may be too small for a four or five line address to fit properly. After making the selections, click "Ok."
Next, from the "Mailings" menu, choose "Select Recipients" and "Use Existing List." The "Select Data Source" dialog box is now displayed. Next go to the location on your computer or network drive where the label file was saved (in the example below, the computer desktop). Highlight the file and click on "Open."

The screen featured below should appear. In order to properly format the data from the Excel spreadsheet in the labels, click on "Insert Merge Field" in the "Write & Insert Fields" submenu.

The following dialog box will appear. Keep the default "Database Fields" selected. Make sure that "ITEM1" is highlighted and select "Insert" and then "Close."

"<ITEM1>" now appears on the first line of the first record (see example below.) The cursor should be to the right of "ITEM1." Hit ENTER to move to the next line and then click on "Insert Merge Field" again.

This time, highlight "ITEM2" and select "Insert" and "Close."

Now "ITEM2" appears beneath "ITEM1" in the first record.

Repeat this process until all items have been inserted into the first record. When complete, the result should resemble the example below.

Now click on "Update labels" in the "Mailings" menu.
The following screen demonstrates that the layout of the first label has been duplicated in every label. Click "Preview Results" to view the labels populated by the merged data from the Excel spreadsheet.

The labels are now displayed as they will be printed. At this point, if anything needs to be changed, repeat the previous steps. Otherwise, choose "Finish and Merge" to print the labels.
